What’s this about?

This site is an official rules reference for Now or Never by Red Raven Games.
It’s great for finding a specific rule quickly. It’s also an excellent supplement to the rulebook included in the box, when watching a how-to-play video, or while teaching the game.
Usage Tips
Back & Forward Nav: Think of each rule entry as a separate webpage. If you want to jump back, hit your Back button.
Check the Index : Don’t see what you’re looking for? The Index has every term in the game.
Install it: This site is a (Progressive Web App). You can install it as a standalone app that is lightning fast, and works even when you’re offline.
Link to a rule: Want to share a link to a particular rule? Just click its title!
Credits
Game Design: Ryan Laukat
Illustrations and Graphic Design: Ryan Laukat
Rule Book: Ryan Laukat
Editing: Ryan Laukat, Malorie Laukat
Development: Ryan Laukat, Malorie Laukat
Writing: Ryan Laukat, Malorie Laukat, Brenna Asplund
Proofreading: Malorie Laukat, Brenna Asplund, Diana Parkin
Playtesters: T. Alex Davis, Brenna Asplund, Eric Rayl, Brandon Laukat, Scott Hendrickson, Dave Jeffers, Jake Simmons, Katie Arends, Jean-Samuel Gauthier-B., Elisabeth Desjardins, Richard Junior Charron, Michael Blank, Thorsten Blank, Diego Castro, Helge Burger, Derek DiCesare, Davis Fettes, Kyle Grimsley, Amanda Grimsley, Andreas Nienkötter, Christian Sievers, Nuyki, Dan Miller, Jerry Hsu, Sara Belisle, Becky Nelson, Timothy Nelson, Leon Niewoit, Sarah Niewoit, Alison Parkllan, Bryce Parkllan, Bill Webb, Paris Nicolaides, Amelia Grimaldi, Mitchell Cooper, Felix Bestehorn, Birgit Komander, Niko, Xyon, Tom Castellani, Davis Fettes, Nynke Rixt Bosma, Mandy Fransz, David Connick, Thorin Finch, Hadrian Finch, Bennett McBrayer, Oliver Goeken, Aidan Klein, Ethan Cheney, Kyle Patterson, Johnathan Frunzi, David Hull, Seth Blackman, Douglas Fenderson, Chaslyn Drilling, Teresa Telesco, Jeremy Knutson, Luke Knutson, Allison Bradley, Mike Jones, Eric Liegel, Sophie Schwabe, Bayard Catron, Jamey Pratt, Ben Burch, Lloyd Gyan, Ramsey Shehadeh, Christopher Gross, Daniel Dowhan, Simcha Kuritzky, Steven Quade, Eddie Chen, Rachel Walkowiak, Stephen Daldry, Lloyd Gyan, Justine Archambault, Johanne Richard, Jonathan Roy, Frédéric Fortier, Greg Forster
Copyright 2021 Red Raven Games
Importers
Esdevium Games Ltd – trading as Asmodee UK
6 Waterbrook Road
Alton
Hampshire
GU34 2UD
Authorised Représentative : Asmodee Group 18, rue Jacqueline Auriol
Quartier Villaroy
BP 40119 78041
Guyancourt Cedex – France
- Last checked
On Your Turn do one of the following…
Specialist Action
- Select a face-up specialist, and choose one option…
- Pay one of your specialists
- Perform the specialist’s action
- Pay another player’s specialist
- The other player collects tax from the supply
- Perform the specialist’s action
- Pay double to recruit a new specialist
- Add the specialist to your hero board
- Perform the specialist’s action
- Rest one of your specialists
- Pay one of your specialists
- Flip the specialist face down.
- Draw a card from the solo deck and perform bot actions.
Hero Action
If you have at least 1 heart and an unused hero action token…
Example
- Move
- Play a Quest Card (optional)
- Choose one (optional)…
- Draw a card from the solo deck and perform bot actions.
If you run out of hearts, your turn immediately ends and you receive no rewards.
Pass
Once you pass, you cannot take any more actions until the next season.
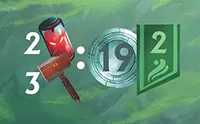
Seasons
Now or Never is played in rounds, called seasons.
Each season, starting with the first player, players take turns in clockwise order performing one action each until all players pass. When all players have passed, players simultaneously perform the production phase. After this, a new season begins and play continues.
After six five four seasons, the game ends. Players perform the final production phase and score victory points. The player with the most points wins.
When all players you have passed, perform the production phasefinal production phase…
- Discard all…
- Goods (shell, tool, bottled demon, and crystal)
- Coins
- Uncompleted quest cards
- Uncompleted order tokens
- Collect…
- Goods from housed villagers
- Resources or hearts from production buildings
- 1 coin for each search token you have claimed
- Refill empty mana slots
- Reset hero action tokens
- Flip specialists face up
- Advance the season marker 1 space
- Begin the next season
- Gain VPs for…
- Filled upper-tier building rows
- Sets of villagers in housing rows
- Reputation
- Some buildings…
- Bottled Demons Lab: 3 VP per bottled demon
- Crystal Lab: 3 VP per crystal
- Workshop: 3 VP per tool
- Library: 3 VP per adjacent book icon
- Market Hall: 3 VP per adjacent good icon
- Town Hall: 3 VP per adjacent bed icon
- Completed quest cards
- Completed order tokens
- Sell goods for coins, then gain 1 VP for each coin you have
For the bot, just shuffle all solo cards and make a new pile, then turn its face-down specialists face up.
Anytime Actions
You may take the following actions at any time, even after you have passed or when it is not your turn. You can even perform these actions during the production phase.
- Sell goods for coins using market values on the season board.
- Place a villager into housing on your hero board.
- Complete an order token from the Tower of Miners.
- Refill villagers on the season board for 2 experience.
- Purchase a hero ability with experience.
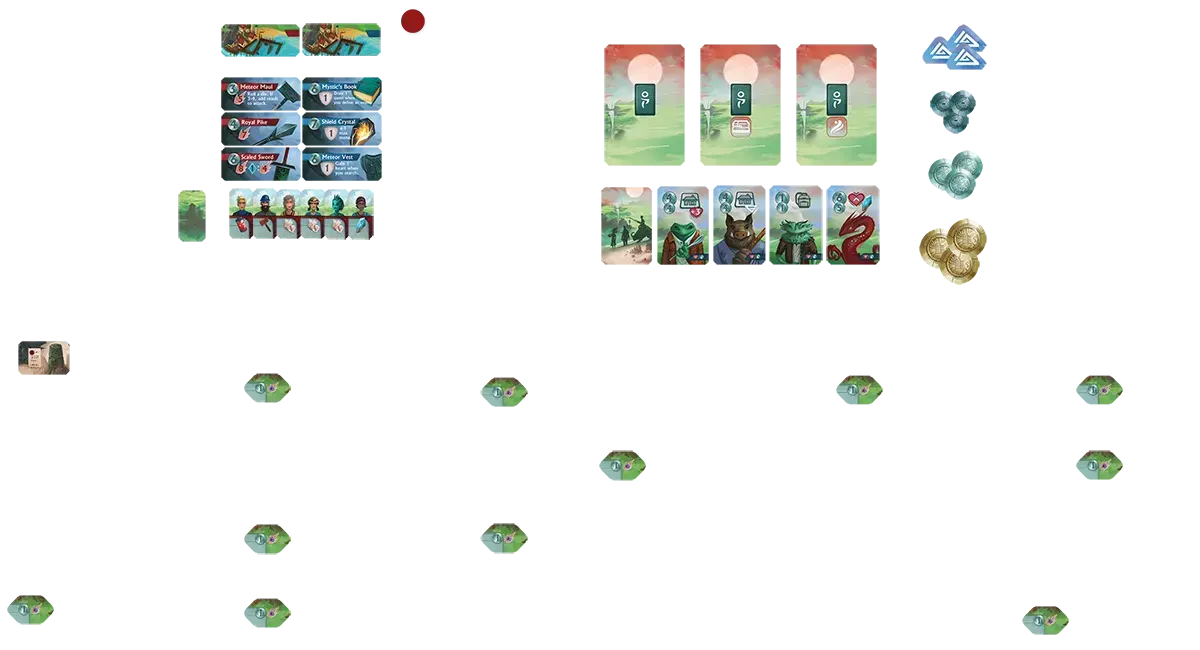
Components
-
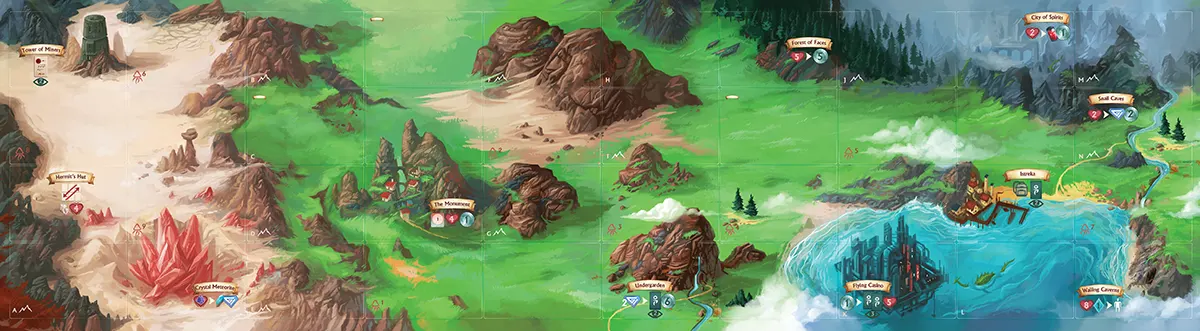 Game board
-
 Town board
-
 Season board
-
 Hero board
-
-
 basic
basic
-
 artifact
-
 advanced
-
-


 Hero cutout
-
 Villager token
-
 Solo cards
-
 Building tile
-
 Books
Books Shells
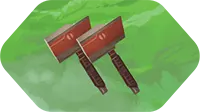
 Tools
Tools Crystals
 Bottled Demons
-
-
-
 Enemy
Enemy
-
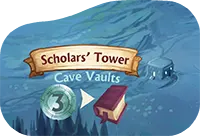
 Random location tile
-
 Hero ability
-
 Gear
Gear
-
 1st player token
-
 Experience
-
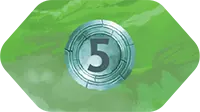
 Season marker
-
 Search token
-
 Order token
-
 Mana token
-
 Hearts marker
-
 Hero action token
-
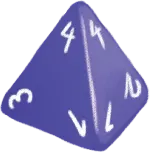 4-sided die
These are components that have associated rules. For a full list of components, incluing quantities, see the rulebook.
Buildings
Some specialist’s actions are to build buildings in your town. Buildings house villagers, add to production, and more. Select a building below for details…
-
Bottled Demons Lab: Gain 3 victory points at game end per bottled demon you produce in the final production phase. All produced bottled demons in the final production phase are counted (from buildings and villagers), before you sell them for coins/victory points. This building has an extra bed, which means it can house up to 2 villagers.
-
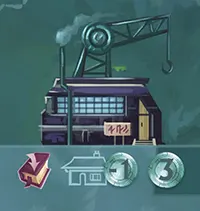
Construction HQ: Gain 1 book when you build this building. Pay 1 fewer coin each time you build another building.
-
Crystal Lab: Gain 1 book when you build this building. Gain 3 victory points at game end per crystal you produce in the final production phase. All produced crystals in the final production phase are counted (from buildings and villagers), before you sell them for coins/victory points.
-
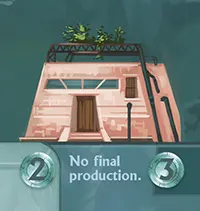
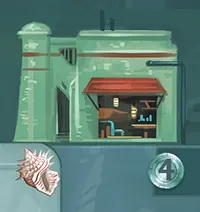
Garden House: Collect 2 coins during production except during the final production phase.
-
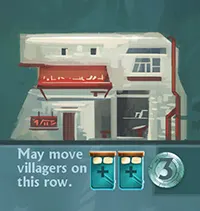
Inn: This building has 2 extra beds, which means it can house up to 3 villagers. Also, you may, at any time, move a villager placed in housing on this row to any other row with available housing.
-
Library: Gain 3 victory points at game end per building in town that is adjacent to this building that has a book icon. (Do not count this building.)
-
Market Hall: Gain 4 victory points at game end per building in town that is adjacent to this building that produces any 1 of the 4 goods (not hearts or coins).

-
Production Buildings: This building produces 1 shell at the end of each season. It also has an extra bed, which means it can house up to 2 villagers.
-
Production Buildings: This building produces 1 shell at the end of each season.
-
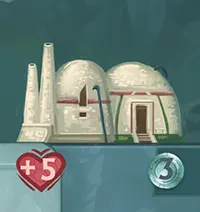
Production Buildings: When this building is in your town, gain 5 hearts at the end of each season.
-
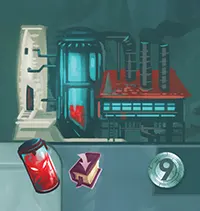
Production Buildings: This building produces 1 bottled demon at the end of each season. Gain 1 book when you build this building.

-
Production Buildings: This building produces 1 bottled demon at the end of each season. It also has an extra bed, which means it can house up to 2 villagers.
-
Production Buildings: This building produces 1 crystal at the end of each season.
-
Production Buildings: This building produces 1 crystal at the end of each season. Gain 1 book when you build this building.
-
Production Buildings: This building produces 1 tool at the end of each season.
-
Production Buildings: This building produces 1 tool at the end of each season. It also has an extra bed, which means it can house up to 2 villagers.
-
School: This building gives you 1 book when you build it, but it has no other abilities.
-
Snail Ranch: Gain 1 book when you build this building. Each time you take a hero action, you have +1 movement.
-
Town Hall: Gain 1 book when you build this building. Gain 2 victory points at game end per bed icon in a building in town that is adjacent to this building.
-
Workshop: Gain 1 book when you build this building. Gain 2 victory points at game end per tool you produce in the final production phase. All produced tools in the final production phase are counted (from buildings and villagers), before you sell them for coins/ victory points.
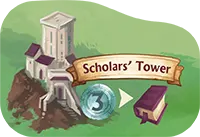
Locations
When you visit a location, you can perform the action that is shown there. Select a location below for details…

-
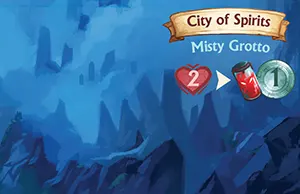
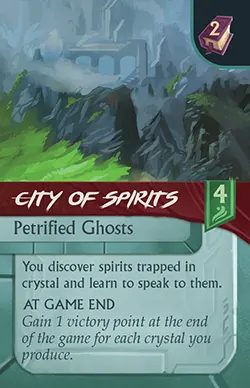
City of Spirits: Lose 2 hearts. Gain 1 bottled demon and 1 coin.

-
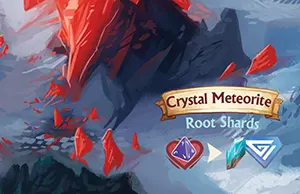
Crystal Meteorite: Roll a die and lose the resulting number of hearts. Gain 1 crystal and 1 experience.
-
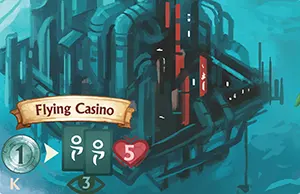
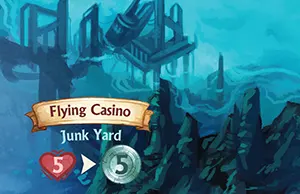
Flying Casino: Pay 1 coin. Draw 3 quest cards of any type and keep 2 (discard the other). Gain 5 hearts.
-
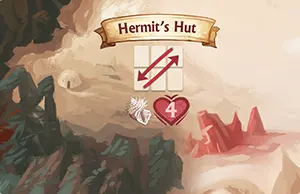
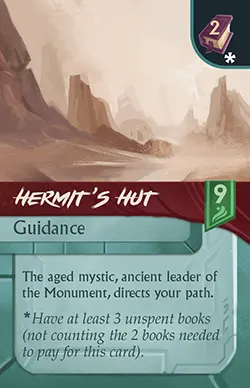
Hermit’s Hut: You may swap the location of two buildings in your unbuilt building grid (so that you can more easily access a specific building that you want to build). Also gain 1 shell and 4 hearts.
-
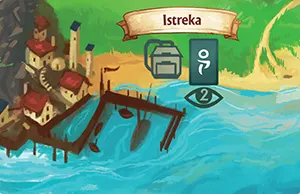
Istreka: You may buy 1 gear token from the season board. Also draw 2 quest cards of any type and keep 1 (discard the other).
-
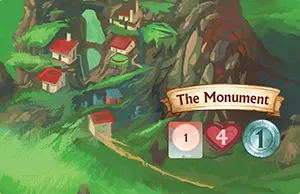
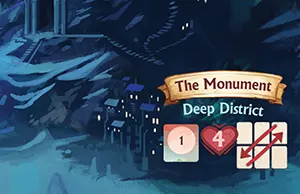
The Monument: Gain 4 hearts and 1 coin. Also take the first player token. If you still have the first player token at the start of the next season, you take the first turn. (Another player may claim the first player token after you.)
-
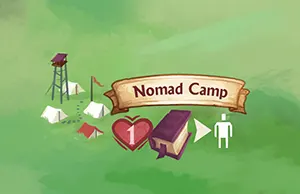
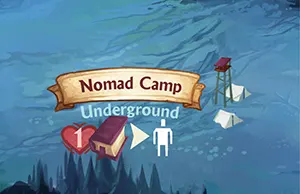
Nomad Camp: Lose 1 heart, pay 1 book, and gain 1 villager (from the season board). If there are no available villagers, draw 6 new villagers to refill the slots.
-
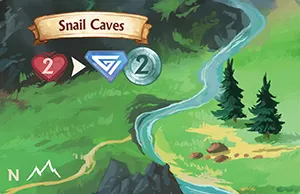
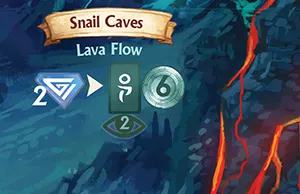
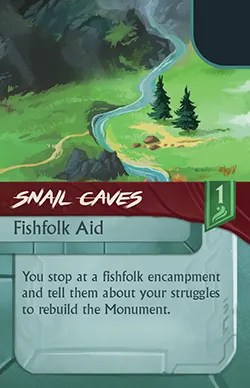
Snail Caves: Lose 2 hearts to gain 1 experience and 2 coins.
-
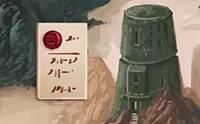
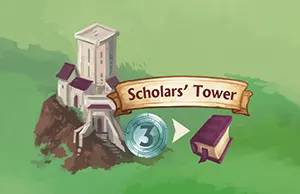
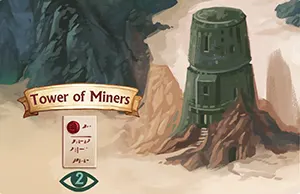
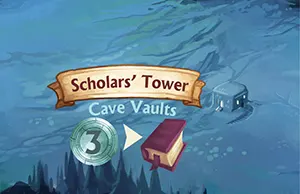
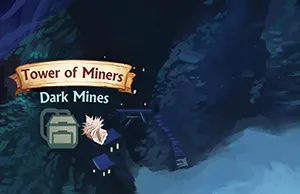
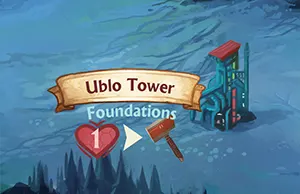
Tower of Miners: Draw 2 order tokens and keep 1. (Place the other tile at the bottom of the pile). Place the order face up near your town board. You can complete the order at any later time (except in the final production phase). When you complete an order, place the token face down near your town board. You can only complete each order once.
-
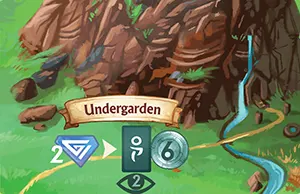
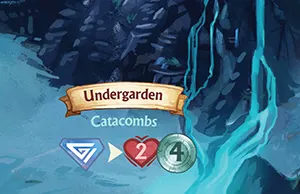
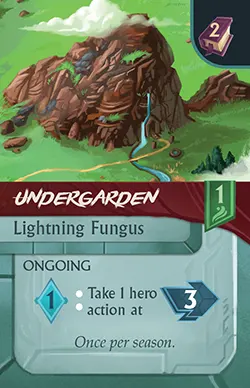
Undergarden: Pay 2 experience, draw 2 quest cards of any type, keep 1 (discard the other), and gain 6 coins.
-
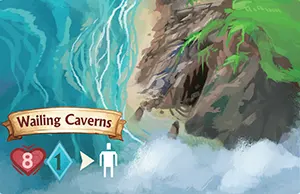
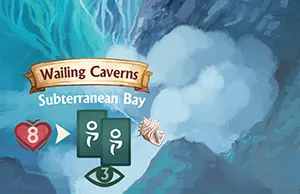
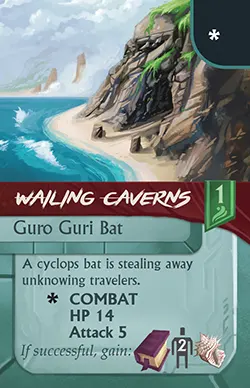
Wailing Caverns: Lose 8 hearts and pay 1 mana to gain 1 villager from the season board. If there are no available villagers, draw 6 new villagers to refill the slots.
-
City of Spirits: Lose 2 hearts. Gain 1 bottled demon and 1 coin.
-
Crystal Meteorite: Roll a die and lose the resulting number of hearts. Gain 1 crystal and 1 experience.
-
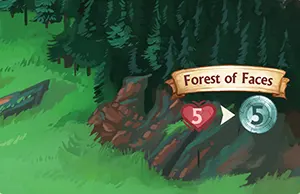
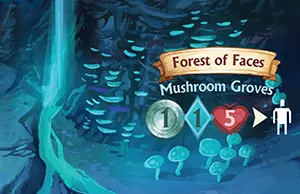
Forest of Faces: Pay 1 coin, 1 mana, and lose 5 hearts to gain 1 villager (from the season board). If there are no villagers, draw 6 new villagers to refill the slots.

-
Hermit’s Hut: Gain 1 experience. Draw 3 quest cards of any type, and keep 1 (discard the others).
-
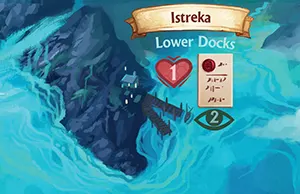
Istreka: Gain 1 heart. Draw 2 order tokens and keep 1. (Place the other tile at the bottom of the pile). Place the order face up near your town board. You can complete the order at any later time (except in the final production phase). When you complete an order, place the token face down near your town board. You can only complete each order once.
-
The Monument: Gain 4 hearts. Also take the first player token. If you still have the first player token at the start of the next season, you take the first turn. (Another player may claim the first player token after you.) You may also swap the location of two buildings in your unbuilt building grid (so that you can more easily access a specific building that you want to build).
-
Nomad Camp: Lose 1 heart, pay 1 book, and gain 1 villager (from the season board). If there are no available villagers, draw 6 new villagers to refill the slots.
-
Snail Caves: Pay 2 experience. Draw 2 quest cards of any type and keep 1 (discard the other). Gain 6 coins.
-
Tower of Miners: You may buy 1 gear token from the season board. Also gain 1 shell.
-
Undergarden: Pay 1 experience to gain 2 hearts and 4 coins.
-
Wailing Caverns: Lose 8 hearts. Draw 3 quest cards and keep 2 (discard the other). Gain 1 shell.
Icons
Specialist’s Actions
On your turn you can pay a specialist to build, gain experience, heal, buy gear, and more. Select a specialist below for details…
-
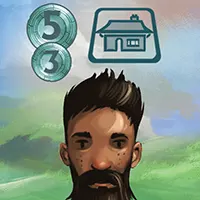
Starting Specialist: Pay 5 coins to heal and gain 1 experience.
-
Story Specialist: Pay 4 coins to build, then gain 1 crystal.
-
Specialist: Pay 5 coins to build, then gain 1 bottled demon.
-
Specialist: Pay 4 coins to build, then gain 1 experience.
-
Specialist: Pay 4 coins to build, then gain 1 experience.
-
Specialist: Pay 3 coins to gain 2 experience and 2 hearts.
-
Specialist: Pay 4 coins to gain 2 experience and 1 tool.
Setup
Retrieve the correct book for your current chapter and return the rest to the game box. Each chapter has some modified setup rules, listed at the start of each chapter. Be sure to check these before starting.
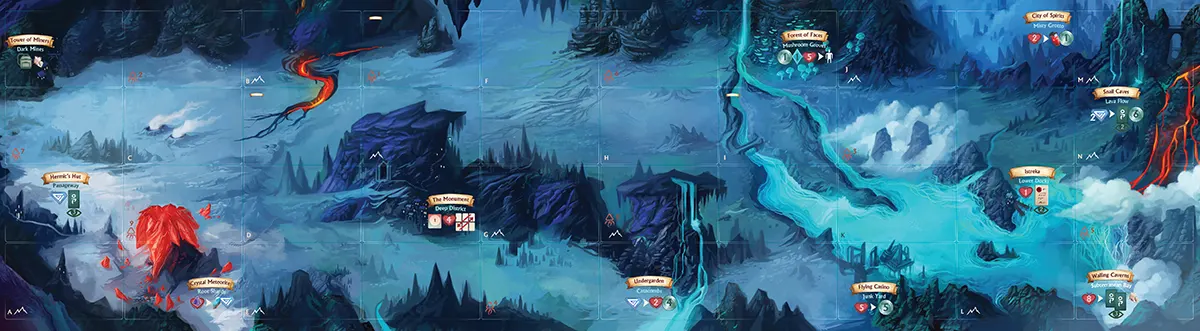


- Place the game board in the center of the table. Be sure not to cover up any mountain symbols as you place tiles on the board…
- Shuffle the 3 random location tiles and place them on the board, one on each of the spaces with the small scroll symbol in the top left corner.
- Shuffle the order tokens and place them in a face-down stack on the top left space on the map (Tower of Miners).
- Place enemy tokens on the 9 spaces on the board with enemy symbols. Match the enemy level at the top of the enemy token with the number on the board. Place 2 enemy tokens for levels 1–8, and only 1 token for level 9. Place 1 enemy token per player for levels 1–8. For level 9, place 2 enemy tokens if playing with 3–4 players, and only 1 token if playing with 2 players. Be sure to use underground enemies for levels 2, 5, and 7. Return the unused enemy tokens to the box.
- Shuffle the search tokens and place one face down on each space with a letter in the bottom left corner: A-N A, B, C, D, E, F, H, I, J, L, and M B, C, D, E, F, H, J, L, and M. (The faces have variable rewards. The backs are identical.) Return the unused search tokens to the box.
- Place the season board next to the game board. Place the side with the reputation track (flame symbols) face downup, and place your hero’s reputation marker at 0. (The reputation track is for story mode.) Shuffle the villager tokens in a pile, face down. Draw 6 and place them face up in the 6 slots on the season board.
- Shuffle the red gear tokens and the blue gear tokens in their own piles, face down. Place the piles on the season board, then draw 3 red gear tokens and 3 blue gear tokens and place them face up in the slots below.
- Place the season marker on space 1 of the season track.
- Organize the quest cards into 3 piles according to their backs. The quest card types are: basic, artifact, and advanced. Shuffle each pile and place them face down near the board.
- Shuffle the specialist tiles (no sunset icon on back) and place the pile, face down, to the side of the game board. Draw the top 4 tiles and place them face up in a row nearby.
- Place the coins and experience tokens to the side of the board. This is called the “supply.” These components are not limited. If you ever run out, use a suitable replacement. All other game components are limited by amount.
- Shuffle the 9 solo cards and place them in a face down stack.

Each player chooses a hero board and sets up their individual play area by following these instructions:
Choose a hero board and set up your play area by following these instructions:
- GiveTake 1 random starting builder (building icon) and 1 random starting healer (heart icon) to each player. Place your 2 starting specialists face up on 2 available slots at the top of your hero board. Starting specialists are indicated by the sunset icon on the backs of their tiles.
- Place a heart marker on the space farthest to the right on your heart track, indicating full health.
- Place 1 mana token on each mana symbol to the right of your heart track.
- Take 3 hero action tokens and place them on the faded arrow symbols on your hero board.
- Place 1 die near your hero board.
- Take your 6 matching hero ability tokens (3 red, 3 blue) and place them below your hero board.
- Take a town board and place it to the side of your hero board (with the above ground side face up).
- Take the following markers and place them on the 0 space on the resource track at the bottom of your town board: book, shell, tool, bottled demon, and crystal.
- There are 4 identical sets of building tiles in the game. (Each set is differentiated by the color on the back of the tiles.) Take 1 set of tiles, shuffle them face down, and place them face up in a 5x4 grid to the side of your town board. Once placed in this grid, the tiles cannot be rearranged unless you take specific actions in the game.
- Take 17 1 shell villager, 1 experience token, and 25 1 shell villager, 1 tool villager, 1 bottled demon villager, 2 experience tokens, and 30 coins from the supply.
- Draw 6 basic quest cards, 1 artifact quest card, and 1 advanced quest card. Choose 4 cards to keep, and discard the others in their own discard piles to the side of each draw pile.
- Place your hero cutout in a standee, and place it on the Monument space on the game board.
- The player who most recently won a game takes the first player token. Play moves in a clockwise direction. The 2nd and 3rd players start with 1 extra coin, and the 4th player starts with 2 extra coins. Return any other unused components to the box. Select one of the unused hero boards for the bot and place the two starting specialists on the board. The bot does not use hearts, mana, a town board, buildings, resources, experience, coins, ability tokens, quest cards, or a standee.
- If continuing a campaign, the player who had the lowest score in the previous chapter starts with +4 coins and +1 reputation. The player who had the highest score in the previous chapter can choose to start on any space on the game board.
Hero Abilities
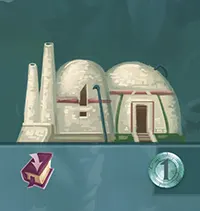
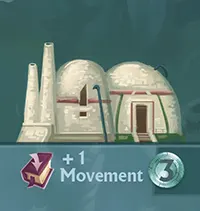
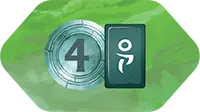
Ability token
- Color: This is a blue ability.
- Experience cost: Amount of experience to purchase this ability.
- Level: This is a level 2 blue ability. You must first have a level 1 blue ability to buy this.
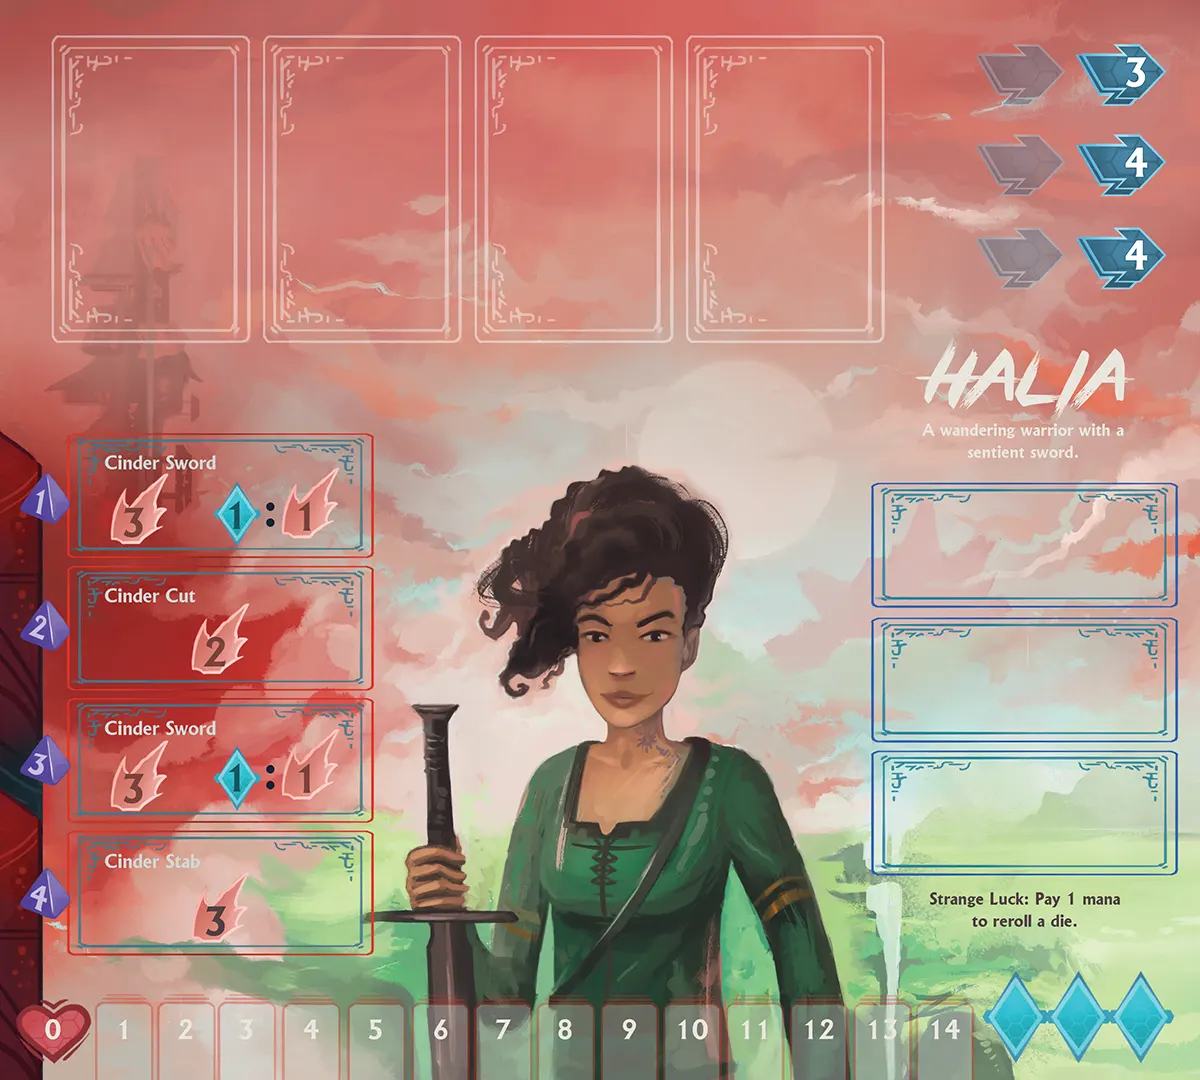
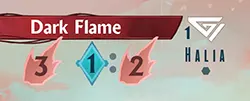
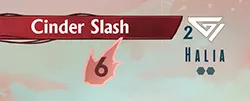
Purchase a hero ability. At any time, you can purchase one of your hero abilities. Pay the specified amount experience and place it on your hero board (in an appropriate red or blue slot). To purchase an ability, you must also meet the ability level requirements. The ability level is indicated by small hexagons on the right side of the token. You must first own a level 1 ability to purchase a level 2 in the same color, or a level 2 before purchasing a level 3. For example, if you want to purchase Halia’s level 2 red ability, Cinder Slash, you must first own her level 1, Dark Flame. Once you own one level 1 ability, you can purchase any number of level 2 abilities in the same color.
Ability Descriptions
Select an ability below for more details…
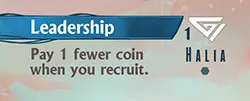
-
Leadership: Whenever you recruit a new specialist from the row, you pay 1 fewer coin.
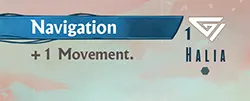
-
Navigation: Each time you take a hero action, you have +1 movement.
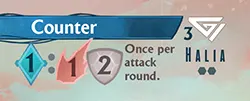
-
Counter: Once per combat round, you may pay 1 mana to deal 1 damage to your enemy and reduce how much damage you take by 2.
-
Dark Flame: When you roll the assigned number for this red ability, you deal 3 damage, and you may deal an additional 2 damage if you pay 1 mana.
-
Cinder Slash: When you roll the assigned number for this red ability, you deal 6 damage.
-
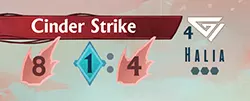
Cinder Strike: When you roll the assigned number for this red ability, you deal 8 damage, and you may deal an additional 4 damage if you pay 1 mana.
-
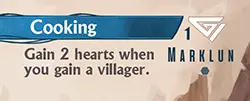
Cooking: You gain 2 hearts whenever you gain a new villager token.
-
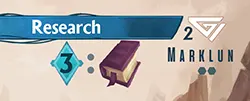
Research: Pay 3 mana to gain 1 book. You may perform this as many times in one turn as you want.
-
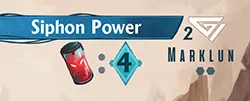
Siphon Power: Pay 1 bottled demon to gain 4 mana. You may not gain more mana than you have available empty mana slots. You may perform this as many times in one turn as you want.
-
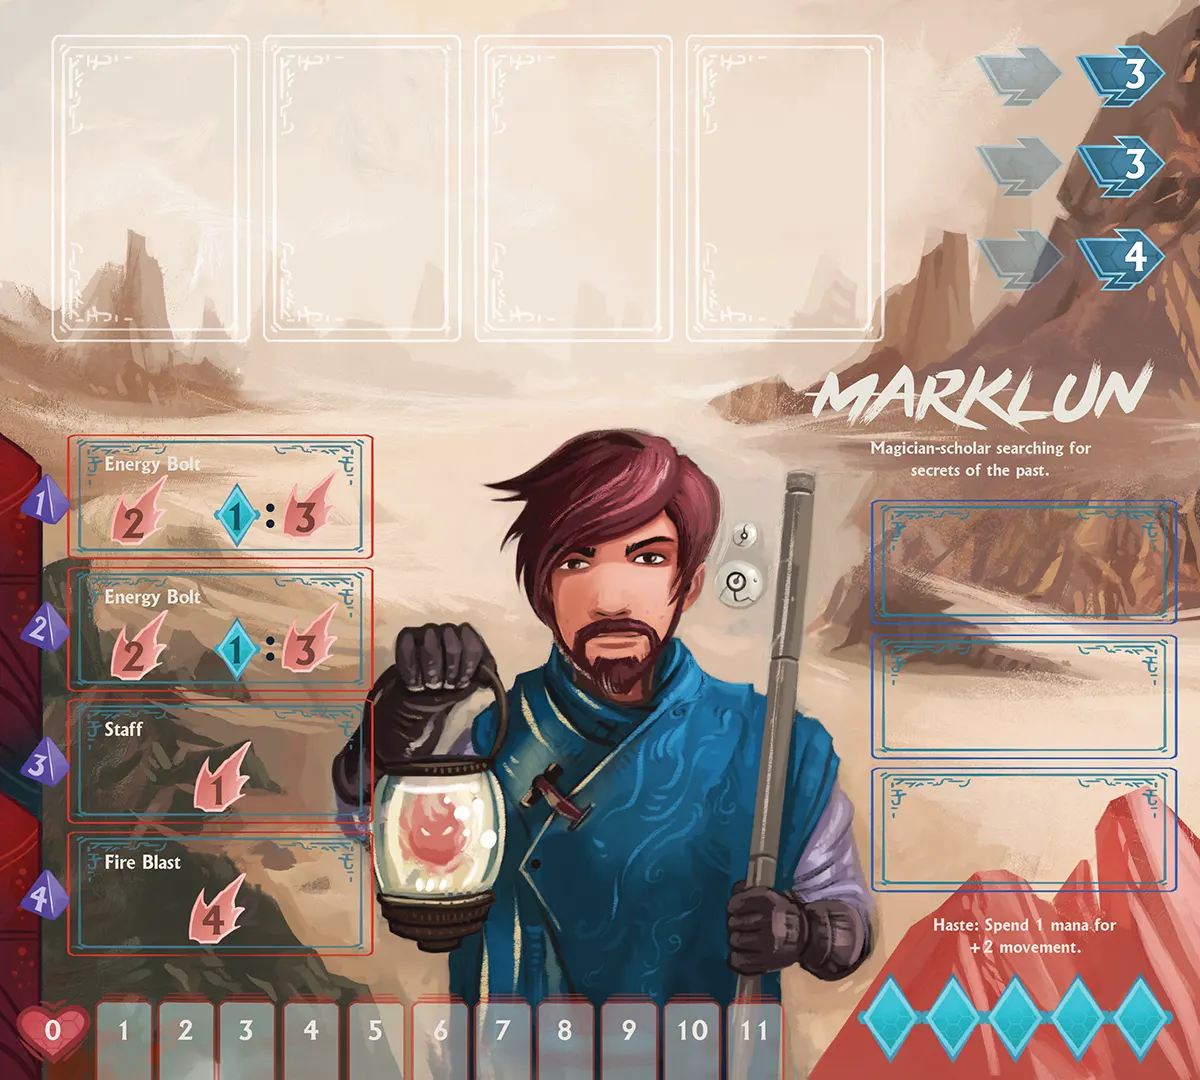
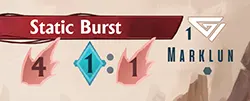
Static Burst: When you roll the assigned number for this red ability, you deal 4 damage, and you may deal an additional 1 damage if you pay 1 mana.
-
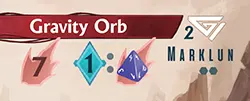
Gravity Orb: When you roll the assigned number for this red ability, you deal 7 damage, and you may spend 1 mana to roll a die and add the result to damage.
-
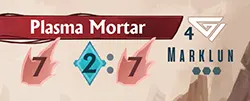
Plasma Mortar: When you roll the assigned number for this red ability, you deal 7 damage, and you may deal an additional 7 damage if you pay 2 mana.
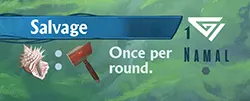
-
Salvage: You may spend 1 shell to gain 1 tool. You may only use this ability outside of combat and you may only use it once per season.

-
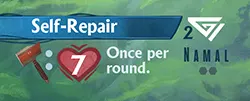
Self-Repair: You may spend 1 tool to gain 7 hearts. You may only use this ability outside of combat and you may only use it once per season. You may not gain more hearts than there are spaces on your heart track.
-
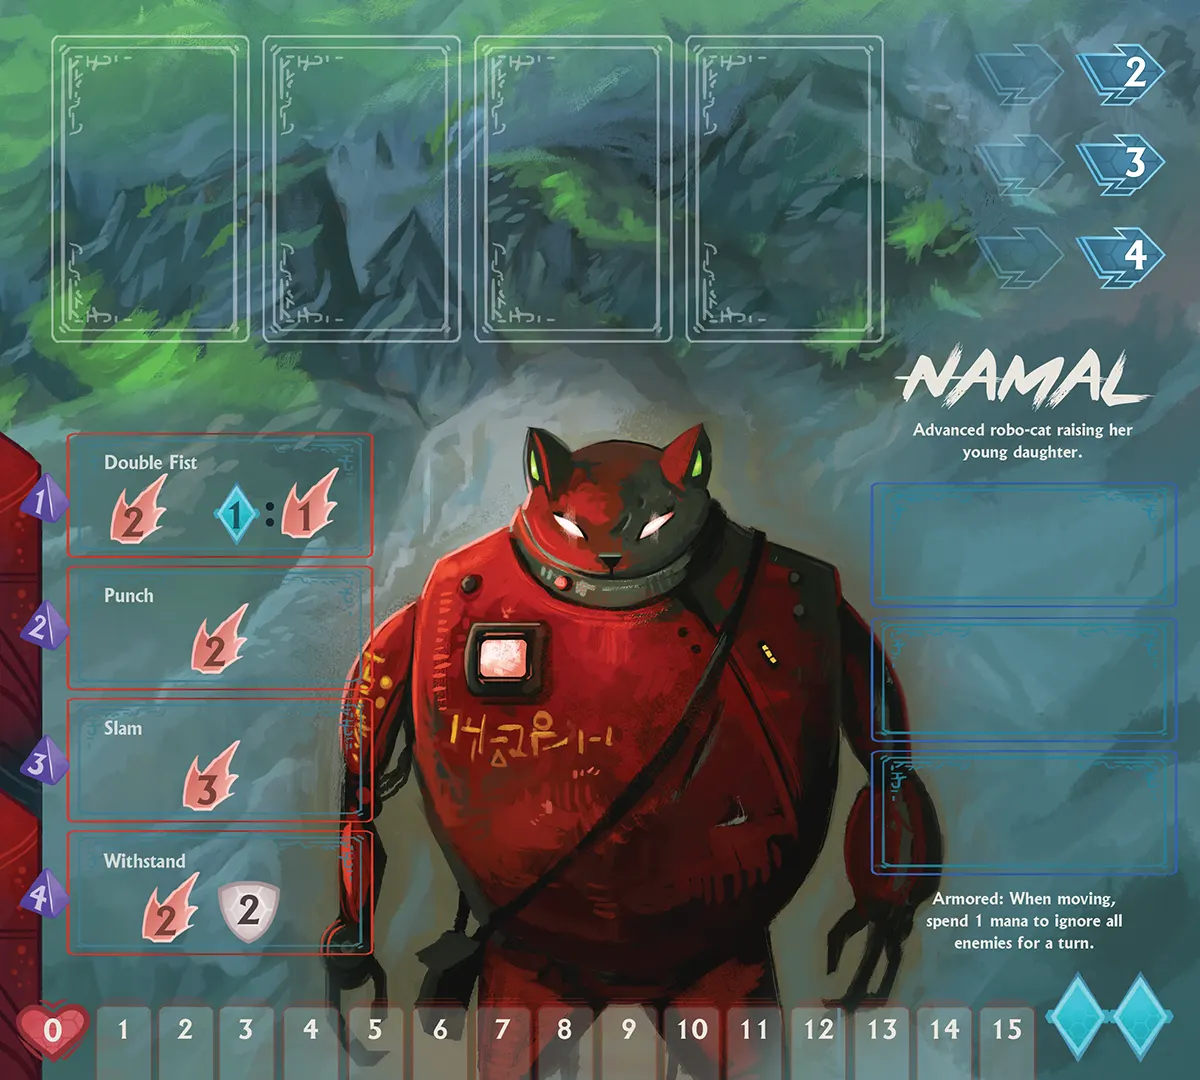
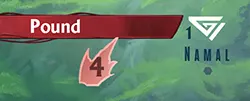
Pound: When you roll the assigned number for this red ability, you deal 4 damage.
-
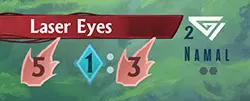
Laser Eyes: When you roll the assigned number for this red ability, you deal 5 damage, and you may deal an additional 3 damage if you pay 1 mana.
-
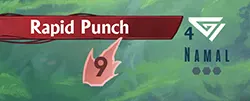
Rapid Punch: When you roll the assigned number for this red ability, you deal 4 damage.

-
Toughness: Take 1 fewer damage each time you search make a choice in a story encounter. For example, if you roll 1 when you search, you take no damage.
-
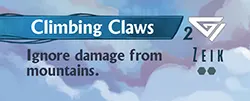
Climbing Claws: When you enter a space with a mountain icon, you don’t lose any hearts.
-
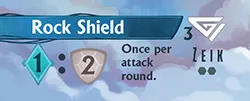
Rock Shield: Once per combat round, you may pay 1 mana to reduce how much damage you take by 2.
-
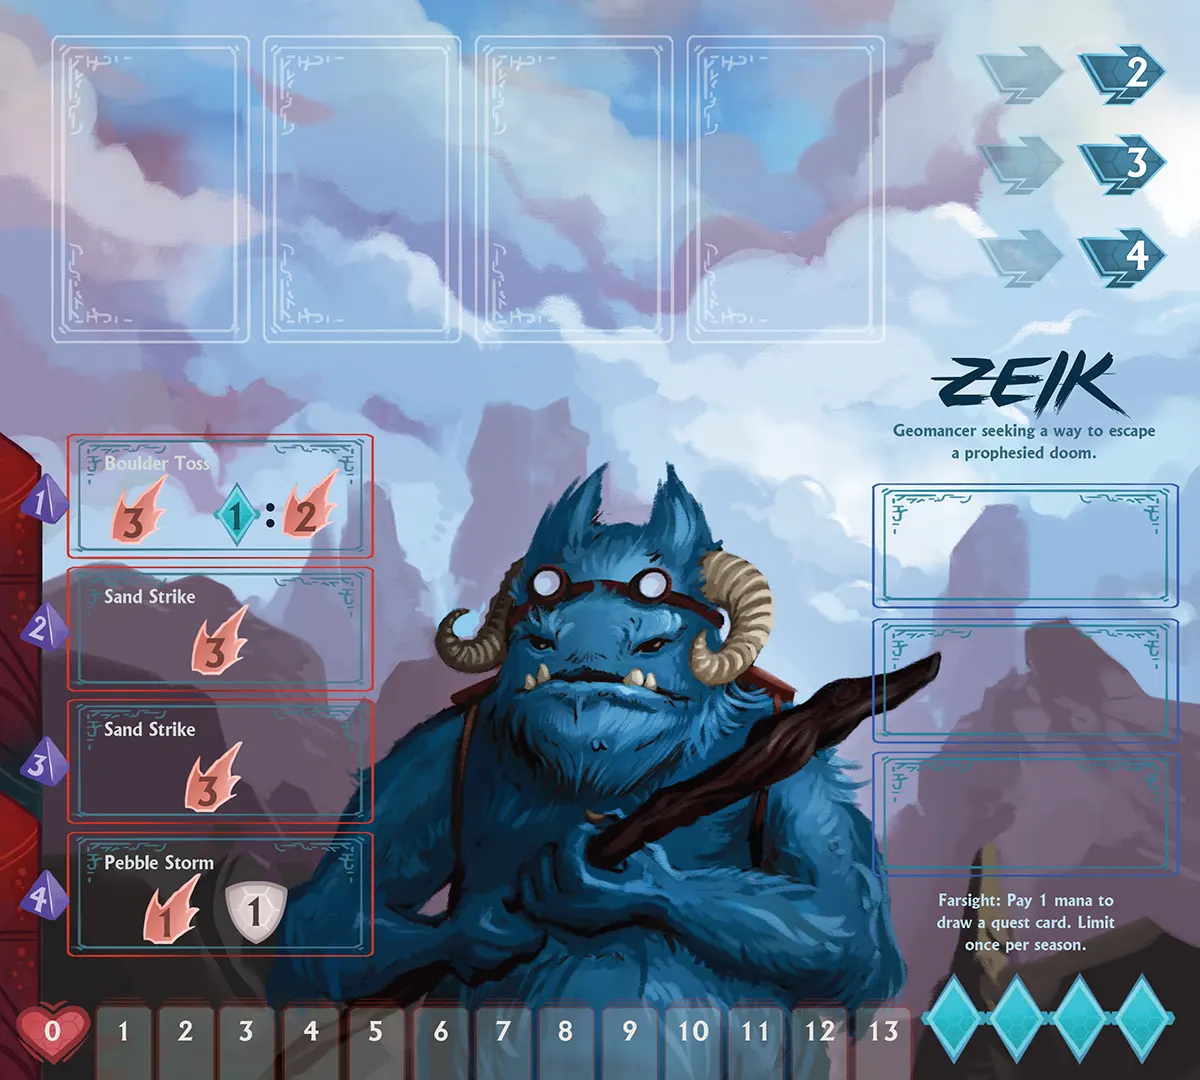
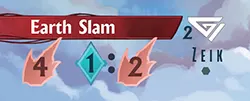
Earth Slam: When you roll the assigned number for this red ability, you deal 4 damage, and you may deal an additional 2 damage if you pay 1 mana.
-
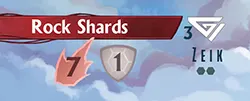
Rock Shards: When you roll the assigned number for this red ability, you deal 7 damage, and reduce how much damage you take by 1.
-
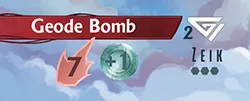
Geode Bomb: When you roll the assigned number for this red ability, you deal 7 damage, and gain 1 coin.
Bot Rules
Solo Card Back
The bot never scores victory points or collects coins, goods, books, or experience. When the bot gains a villager or search token, simply place the villager or search token on the bot’s hero board. If you’re playing in story mode, the bot does not read stories and simply takes search tokens when instructed. If the bot starts combat, it is always successful. When the bot uses a specialist, it simply flips the specialist face down, ignoring the specialist’s specific action.
Turns: You always go first each season. Each time you take a turn, after your turn is finished, draw and reveal the top card from the solo deck. Perform the listed instructions for the bot. After this, you may begin your next turn or pass. If you pass, the bot does not take any more actions that season and you start the production phase.
Production: During the production phase, the bot does not produce any goods. To prepare for the next season, shuffle all solo cards and make a new pile. Turn all of the bot’s face-down specialists face up.
Bot’s specialist: You may pay to use a specialist belonging to the bot. The bot does not collect the tax.
Gaining villagers: When the bot gains villagers, the bot chooses villagers with the following priority: first crystal, then bottled demon, then tool, then shell.
Season end: The season ends when you pass. The bot does not take an action after you pass.
Solo Cards
Recruit specialist
The bot gains a new specialist, the left-most available on the season board. If there are no available specialist slots on the hero board, you choose one of the old specialists to discard. Redraw so that there are 4 specialists available.
Search
The bot takes the search token nearest to you. If there are multiple tokens that apply, you choose which one the bot gains. Place the search token on the bot’s hero board.
Attack (first time)
If the bot has not yet attacked this season, the bot defeats an enemy at the lowest available level (for example, if there are no level 1 enemies left, the bot defeats a level 2 enemy). Discard the enemy token. The bot gains villagers from the display equal to the villager reward on the enemy. The bot does not gain any other listed rewards. If the bot has already attacked this season, ignore this card and draw again.
Roll a die
Place either the order token or the quest cards face down on the bot’s hero board.
Exhaust specialist
The bot uses the left-most available specialist on their hero board OR your hero board (the card text specifies), flipping the specialist face down. If the bot uses your specialist, the bot pays you the tax from the supply.
Build
When you pay a specialist to build, you may place 1 building tile on your town board. Choose 1 tile from your unbuilt building grid and place it on the town board, according to the following rules:
If this is your first building in the game, you must choose a building from the outer border of your grid. On future building actions, you may only choose buildings adjacent to empty spaces in the grid. (The outside border of the grid doesn’t count.)
-
Your first building must be selected from the outer border of buildings in your grid.
-
After your first building, only buildings adjacent to empty slots may be built (in this case, these 3 buildings).
-
If your building grid looked like this, you could build any of the buildings that are not faded out.
You must place your first building in one of the 4 building spaces on the starting building row of your town board (the row with the star). After this, you must place new buildings adjacent to any previously placed building in the town.
Pay the coin cost of the building to the supply. (The coin cost is listed in the bottom right corner of each building tile.) Buildings only cost coins, not goods or books.
If you place a building on a town space with a resource (such as a shell), gain 1 of that resource immediately.
If you place a building on a space with this (coins: build) icon, you must pay the indicated coin cost to build there.
If the building you place has this book and arrow icon on the tile, you immediately gain 1 book (only when you build it). This is not a cost.
Every building built in your town can house 1 villager in the villager space on its row.
Some buildings give a bonus when built.
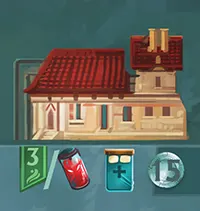
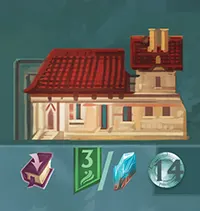
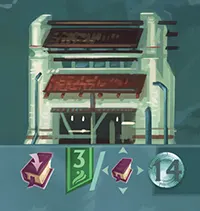
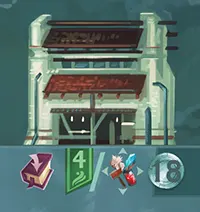
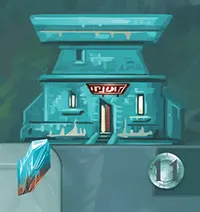
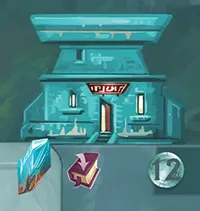
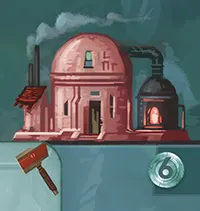
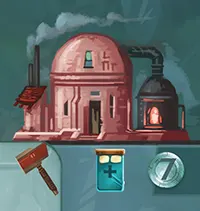
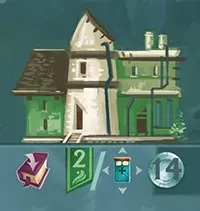
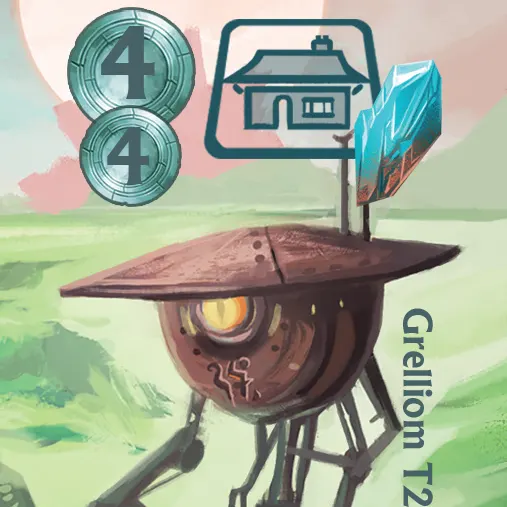
Building tile
- A resource icon in this light gray area in the bottom left corner means that you gain this resource during each production phase.
- This building has a bed icon, so it can house 1 extra villager (2 villagers total).
- This building costs 5 coins to build.
Campaigns
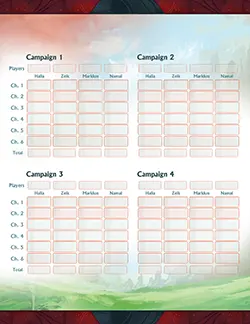
Campaign sheet
When playing story mode, keep track of each player’s victory points at the end of each chapter. Also track their final reputation. When you complete all 6 chapters, each player combines their points from the 6 chapters for a campaign score. The player with the highest total reputation combined from all 6 chapters gains an additional 25 victory points. The player with the highest total victory points is the campaign winner.
Each time you start a new chapter (except for the 1st chapter), the player who had the lowest score in the previous chapter starts with +4 coins and +1 reputation. The player who had the highest score in the previous chapter can choose to start on any space on the game board.
Coins
Coins are used to pay specialists and to build buildings. Each coin is also worth a victory point at the end of the game.
At any time, you can sell goods for coins. Coin icon
 1 coin token
 5 coin token
 10 coin token
End of the Game
During the sixth fifth fourth and final season, follow these steps:
Before producing, you must discard all of your coins and set your resource markers to 0 (except books). Also discard any quest cards or order tokens that are not completed.
You may now produce goods and coins from search tokens as normal and sell all of your goods to gain as many coins as possible.
-

Now count your final victory points:
Each coin is worth 1 victory point
You gain victory points for building 4 buildings in the second, third, and fourth building row from the top: 6, 7, and 8 victory points, respectively.
You gain victory points for each housing row that contains villagers that produce at least 1 of each type of good (shell, tool, bottled demon, and crystal): 5, 5, 6, and 7 victory points, respectively.
Some buildings give victory points for specific requirements.
Gain victory points for completed quest cards.
Gain victory points for completed orders (remember that you cannot complete additional orders in the final production phase).
- Gain victory points for reputation.
The player with the most victory points has done the most to rebuild the Monument and restore the villagers to their hometown and is declared the winner! If there is a tie, the player with the most remaining experience and books is the winner. If still tied, the player with the most remaining hearts is the winner.
If this is the last chapter of a campaign, determine the campaign winner.
Experience
Experience token
Experience can be used to purchase hero abilities, refill villagers, or play quest cards.
Experience can be gained by paying a specialist, fighting enemies, or visiting locations. Experience tokens are not limited. If you ever run out, use a suitable replacement.
Experience is also a tiebreaker at the end of the game.
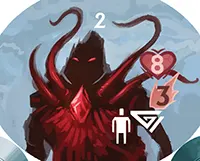
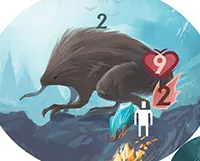
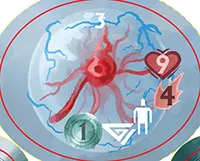
Fight an Enemy
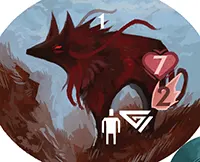
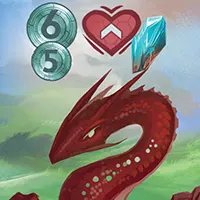
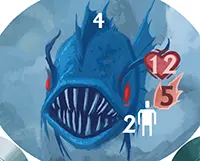
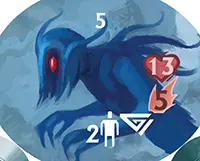
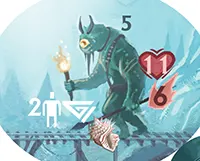
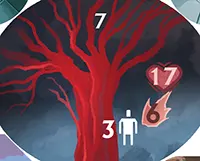
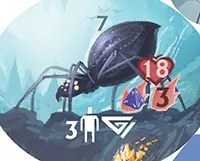
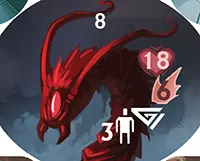
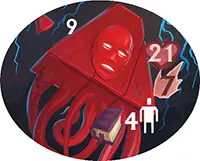
Enemy
- Level
- Health
- Damage
- Rewards
If you end your move on a location with an enemy, you may combat the enemy by following these steps:
-
Roll a die. Check the result on your red combat abilities. Each hero starts with 4 basic combat abilities, one for each number on a 4-sided die. (When you gain a red hero ability token or a red gear token, place it on top of one of your basic combat abilities.) Deal any damage listed on the ability you rolled. The enemy attacks you simultaneously, and you lose hearts equal to the enemy’s attack damage (minus any defense that you have, either from blue abilities/gear or any from the red combat ability you rolled). Only the red ability matching your die roll applies to that round of combat.
-
Enemy combat track
If you’ve dealt cumulative damage equal to the enemy’s health, the enemy is defeated. If you haven’t defeated the enemy yet, you must either start a new combat round or retreat. To start a new combat round, roll to attack again, and repeat the instructions in the previous step, keeping track of the running total of damage you’ve dealt to the enemy. (Use the enemy combat track and a spare token, if needed.) If you defeat the enemy, gain the rewards (white symbols & resources) on the enemy token and discard the token (leaving the rest of the stack below).
-
If you run out of hearts at any time during the attack, even if you simultaneously have dealt enough damage to defeat the enemy, you lose the combat and your turn ends immediately.
-
You may keep attacking until the enemy is defeated, you run out of hearts, or you retreat. To retreat, you leave your hero on the same space, but your turn ends immediately.
-
If you retreat or run out of hearts during combat, the enemy token remains and returns to full health. You do not receive the listed rewards, but you do gain 1 experience token. (Only gain this if you retreat or run out of hearts.)
The rewards for defeating an enemy are experience, villagers, coins, and resources — which are gained in any order. If you defeat an enemy, you rescue villagers trapped or waylaid by the enemy! You choose villagers from any available villager tokens face up on the season board. If there are no villagers left, draw 6 new villagers from the supply and refill the empty slots on the season board. Only refill the row of villagers if there are no more villagers left in the row.
If Namal rolls a 1, she deals 2 damage. At this time, she could spend 1 mana to deal an additional 1 damage.
Red Abilities/Gear: Some red abilities and gear deal extra damage or defense if you pay mana, and some even require that you pay mana to gain any effects at all. A red combat ability can only be used when you roll its assigned number, and only once per combat round. Example: If Zeik rolls a 1 on his first combat roll and Dark Flame is the weapon in his “1” slot on his hero board, he deals 3 basic damage. At this time, Zeik may pay 1 mana to deal 2 extra damage. Zeik can only activate this ability once per roll.
This gear provides 1 defense, reducing damage you take from enemies by 1 each combat round.
Blue Abilities/Gear: Unless otherwise stated, a blue ability that costs mana can be activated at any time on your turn, and you may activate it multiple times (by paying the mana cost each time you activate it). Some blue abilities do not cost mana, such as defensive gear. Defensive gear only activates once per combat round, and it does not apply to damage taken outside of combat.
First Player Token
The player with the first player token takes the first turn each season.
During setup, the player who most recently won a game takes the first player token.
When you visit The Monument location you take the first player token.
Gear
Some specialists, locations, and search tokens allow you to buy gear.
Buy Gear: You may immediately purchase 1 gear token from the season board. Pay the coin cost shown on the gear token, place the new gear on a matching red or blue slot on your hero board, and draw from the appropriate pile to refill the empty slot on the season board. If you do not have a matching open slot on your hero board for the gear token, you must make room by putting an old token in the game box. When placing red gear, you cover up a basic ability on your hero board.
Note: You can purchase multiple copies of the same gear.
Gear Descriptions
Select a gear token below for more details…
-
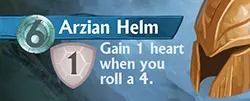
Arzian Helm: Any time you roll a 4 during combat, gain 1 heart. You can choose when during the combat round to gain the heart. For example, you could roll, deal damage, take damage, and then gain the heart. Or you could gain the heart before taking damage.
-
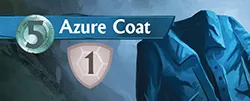
Azure Coat: This gear provides 1 defense, reducing damage you take from enemies by 1 each combat round.
-
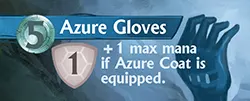
Azure Gloves: If both the Azure Gloves and the Azure Coat are equipped, you gain +1 max mana. Gain the extra mana as soon as you equip this gear. As long as they are both equipped, this mana replenishes at the end of each season.
-
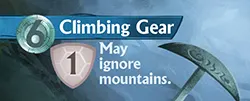
Climbing Gear: This gear provides 1 defense, reducing damage you take from enemies by 1 each combat round. Also, when you enter a space with a mountain icon, you don’t lose any hearts.

-
Energy Blaster: When you roll the assigned number for this red gear, you deal 6 damage.
-
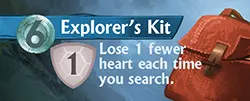
Explorers Kit: This gear provides 1 defense, reducing damage you take from enemies by 1 each combat round. Also, when you search, reduce the number of hearts you lose by 1.
-
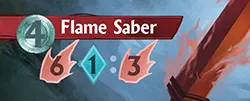
Flame Saber: When you roll the assigned number for this red gear, you deal 6 damage, and you may deal an additional 3 damage if you pay 1 mana.
-
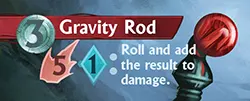
Gravity Rod: When you roll the assigned number for this red gear, you deal 5 damage, and you may spend 1 mana to roll a die and add the result to damage.
-
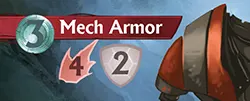
Mech Armor: When you roll the assigned number for this red gear, you deal 5 damage, and reduce damage you take from enemies by 2 this combat round.
-
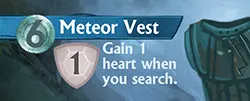
Meteor Vest: This gear provides 1 defense, reducing damage you take from enemies by 1 each combat round. Also, when you search, gain 1 heart before you roll to lose hearts.

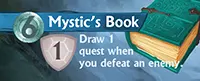
-
Mystic’s Book: This gear provides 1 defense, reducing damage you take from enemies by 1 each combat round. Also, when you defeat an enemy, draw 1 quest card as an additional reward.
-
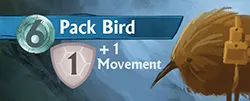
Pack Bird: This gear provides 1 defense, reducing damage you take from enemies by 1 each combat round. Also, each time you take a hero action, you have +1 movement.
-
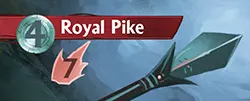
Royal Pike: When you roll the assigned number for this red gear, you deal 6 damage.
-
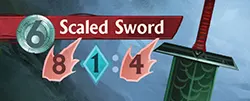
Scaled Sword: When you roll the assigned number for this red gear, you deal 8 damage, and you may deal an additional 4 damage if you pay 1 mana.
-
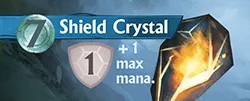
Shield Crystal: When you equip this, you gain +1 max mana. Gain the extra mana as soon as you equip this gear. As long as the Shield Crystal is equipped, this mana replenishes at the end of each season. This gear also provides 1 defense, reducing damage you take from enemies by 1 each combat round.
-
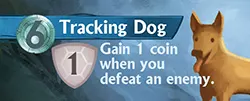
Tracking Dog: This gear provides 1 defense, reducing damage you take from enemies by 1 each combat round. Also, when you defeat an enemy, gain 1 coin as an additional reward.
-
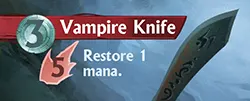
Vampire Knife: When you roll the assigned number for this red gear, you deal 8 damage and gain 1 mana immediately (if you have an empty mana slot). You can use it to activate abilities on the same attack roll. For example, if you rolled the Vampire Knife, you could use the mana to immediately activate Zeik’s Rock Shield.
-
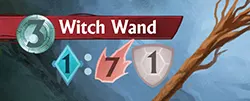
Witch Wand: When you roll the assigned number for this red gear, you may pay 1 mana to deal 7 damage and reduce damage you take from enemies by 1 this combat round.
Hearts
Hearts represent health and vitality. When you lose hearts, you’re expending effort and taking damage, when you gain hearts, you are resting and recuperating.
You may never have more hearts than the maximum number on your heart track. They are also a tiebreaker at the end of the game.
Running out of hearts: If you ever reach 0 hearts during a hero action, your turn immediately ends. You cannot take another hero action until you have at least 1 heart. If this happens when visiting a location, you do not gain any of the rewards of the action. If this happens during combat, the combat ends and the enemy returns to full health. If this happens when picking up a search token, you must leave the search token on the board.
Heal: When you pay a specialist to heal, move your heart marker on your hero’s heart track to the furthest space to the right, indicating full health. If there is a “+mana” icon, restore the indicated number of mana (without exceeding your maximum mana slots). If there is a resource icon next to it, gain 1 of that resource.
Hero Action
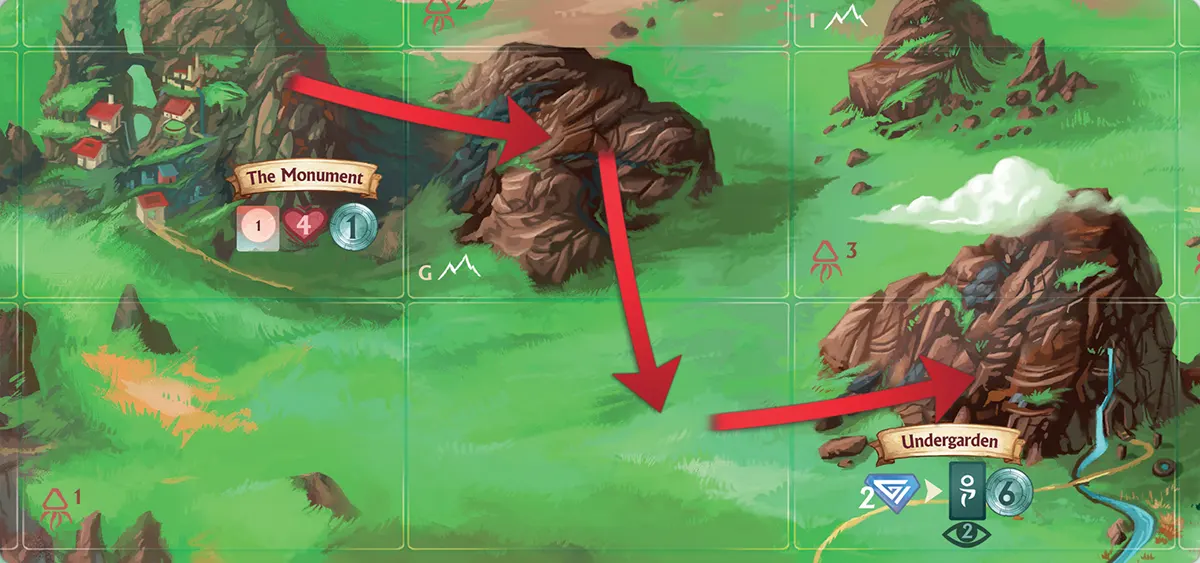
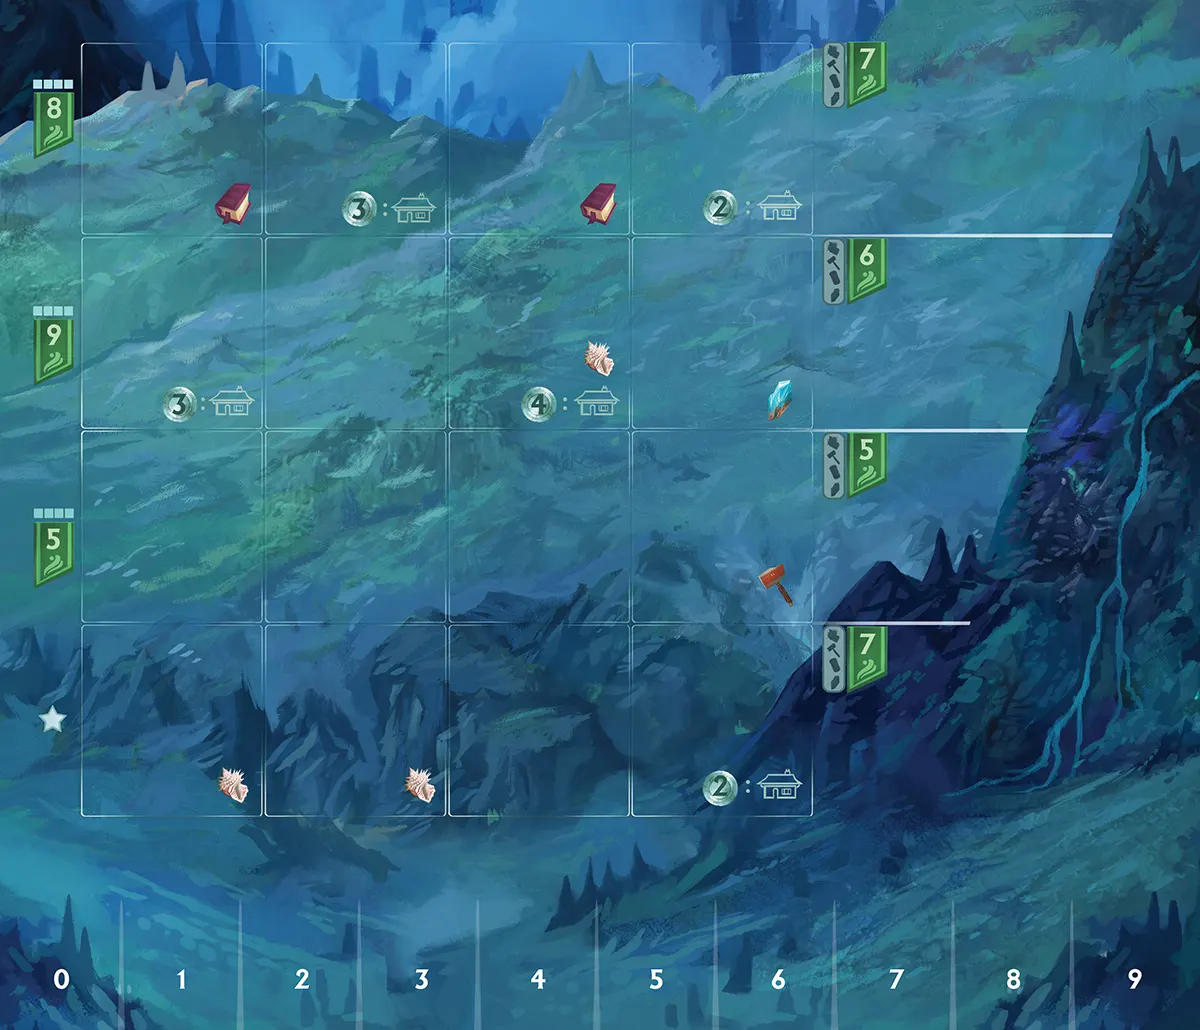
Example: Namal has 2 movement. She starts at the Monument space and moves to the space on the right first, losing a heart because it has a mountain icon. Then she moves to the space below. She’s out of movement, but she can continue to move by losing hearts. She loses 1 heart to move to the right, deciding to stop at the Undergarden space. She then plays an Undergarden quest card. Finally, she visits the Undergarden location, paying 2 experience to draw 2 quest cards (keeping 1) and gain 6 coins.
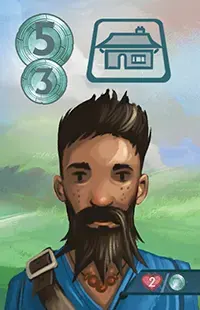
Hero Board
- Hero action slots: You have 3 hero action tokens. When they’re in this position, it means they’re available to be used. When you take a hero action, move a token so that it covers the arrow with the number to the right. Once all 3 arrows have been moved to the right, you cannot take another hero action until the next season.
- Specialist slots: Place your specialists here. You can only have 4 at once. If you ever gain a specialist but all slots are filled, you must discard an old specialist to make room for the new one.
- Blue ability/gear slots: When you gain a blue ability or gear, you must place it in one of these slots. If you have no room, you must discard one of the previously-placed tokens to make room.
- Basic ability: Each hero has a basic ability listed in this location.
- Red ability/gear slots: When you gain a red ability or gear, you must place it in one of these slots, covering the previous ability. If you have no room, you must discard one of the previously-placed tokens to make room.
- Mana slots: These slots hold your mana tokens. When you spend mana, remove the token from your board until the next season. You can never have more mana than slots unless a card/gear/ability specifically states that you can.
- Heart track: Keep track of your hearts on this track. When you reach 0 hearts, you cannot take any more hero actions until you have at least 1 heart. You may never have more hearts than the maximum number on your heart track.
Mana
Mana is used to power gear, abilities, & artifacts, and to play some quest cards.
Empty mana slots are refilled each season during the production phase.
You can never have more mana than mana slots unless a card, gear, or ability specifically states that you can.
Mission Tokens


Mission token
Sometimes a story will instruct you to place your mission token somewhere. When this happens, place the token with your hero image on the instructed location. You may perform a search action at this location to continue a storyline.
When you complete the search action, remove your token from the board (or place it in a new location if instructed). You must take a random search token from the box and place it with your other claimed search tokens so that you gain 1 coin during production (unless the story mission specifically said to discard the search token).
Only you may perform the search action where your mission token is located.
Move
When you take a hero action, you must first move. Slide one of your available hero action tokens so that it covers the hero action slot to the right. Move your hero on the game board according to the following rules:
You must move to a new space. (You cannot stay put and take an action on the same space.)
You may move a number of spaces up to the number in the blue arrow that you cover with a hero action token, plus any bonuses from gear, buildings, etc. To move farther, lose 1 heart per extra space. (You can move as many extra spaces as you want, as long as you have enough hearts to pay for it.) You may stop moving at any time. You may not move diagonally.
-

When you enter a space with a mountain icon, you lose 1 heart.
-
If you enter a space with an enemy and choose not to fight it, you lose 1 heart. You may continue moving if you choose not to fight.
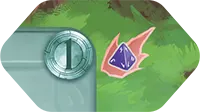
Order Tokens
(back)
You gain order tokens by visiting the Tower of MinersIstreka. At the end of the game, you gain 2 victory points per completed order. You cannot complete an order token in the final production phase!
(front)
Complete an order: At any time, you can complete one of your order tokens. Pay the specified goods to gain the listed coin reward. After this, place the token face down near your town board. You can only complete each order once.
Pass
If you cannot or do not wish to take any more actions this season, you pass. Once you pass, you cannot take any more actions until the next season. Play continues until all players pass. Then the production phase begins.
Play Options
Select any of the following play options in Settings to show these rule changes.
Story Mode
In story mode, you play through a campaign consisting of 6 game sessions, called chapters, starting with chapter 1 and continuing in numerical order to chapter 6. This mode takes longer to play and it is slightly more complicated than standard mode, so it is recommended that you play at least one game in standard mode before trying story mode.
- Setup is modified by each chapter.
- Search tokens trigger stories (instead of losing hearts or gaining rewards printed on the tokens).
- Stories provide unique challenges and rewards.
- Mission tokens link related stories.
- Reputation earns (or loses) victory points.
- The campaign sheet tracks progress and competition across chapters.
Solo Play
When playing solo, you play against an artificial player referred to as a bot. The bot performs game actions but it does not score victory points. Your first victory is achieved when you score 100 or more victory points. After this, you win by beating your high score.
Underground
To play underground, use the opposite sides of the game board and town boards. Replace the standard enemies with the underground enemies of the same level (levels 2, 5, and 7). You can tell which monsters are underground monsters because they have cave art on the backs of the tokens. The location actions and the town board rewards are slightly different on this map and town board, but all other game rules are the same.
Game Length
A typical game is played over six rounds called seasons. For a shorter game, you can choose to play for only five or even four seasons, along with a few setup changes.
Production Phase
If it is the final season, see End of the Game
-
Collect produced goods, adding the totals to your resource track. Each of your villagers in housing produces a specified good, while villagers not in housing do not produce goods. Some buildings also produce a good or other bonuses at this time (specified on the building within a light gray area at the bottom left of the building token). Also, collect 1 coin per search token you own.
-
Refresh your mana by returning any spent mana to the empty mana slots on your hero board.
-
Return all hero action tokens to their starting spaces, to the left of the numbered arrows, so that they’re ready to use again in the next season.
-
Flip all of your specialists face up.
-
Move the season marker 1 space forward.
Begin the next season, starting with the player that has the first player token.
Important!
Players DO NOT refresh their hearts at this time.
Only villagers in housing produce goods.
Specialists DO NOT produce goods in the production phase.
After you have played 6 seasons, the game ends. Play the final production phase instead of a normal production phase, and count victory points.
Quest Card Examples
-
-
-
- This card has no cost to play.
- Gain these victory points at the end of the game if you have played this card. It has no other ability or effect.
-
-
- If you have played this card, follow these instructions at the end of the game. This card also gives 4 victory points at the end of the game.
-
-
- When you play this card, immediately start the combat listed on the card. If you are successful, gain the rewards listed on the bottom of the card. If you fail, you must discard this card.
-
-
- To play this, you must pay 2 books and meet the specific requirement listed at the bottom of the card at the time you play it.
Quest Cards
Quest card examples
Whenever you draw quest cards, you can choose to draw them from any of the three piles. There is no hand limit. If a pile runs out, reshuffle the discard pile.
Play a quest card: After you move your hero, you may play 1 quest card from your hand that matches the location in the space where you stop moving. You play the quest card before visiting a location, combat, or picking up a search token.
Follow the instructions on the quest card. Many times you must pay a resource, coins, or experience to gain a reward. The cost (or other requirement) to play the card is in the top right corner of the card. If there is an asterisk, check the gray area of the card for the requirement.
You must be at the location specified in white text on the red background. For example, you must be at the Undergarden to play the Lighting Fungus card.
After you play the card, tuck it beneath the bottom of your town board so that only the bottom half of the card is showing (with the victory point icon and any ONGOING or AT GAME END effects showing).
advanced
Advanced quest cards usually cost 2 books and give lots of victory points. Some have other requirements to play.
artifact
Artifact quest cards usually cost 2 books and give you an ability you can use by paying mana, which you can use on your turn. Some of these abilities are limited to once per combat round, or once per season. To keep track of the once per season uses, place your spent mana on the card. Remove it at the end of the season.
Artifact Abilities
Demon Trap
Pay 1 mana at any time (except during the final production phase) to gain 1 bottled demon. You may only perform this once per season. Place the mana spent activating the artifact on the token to help you remember that it has been used.
Life Candle
Lightning Fungus
Pay 1 mana to take 1 hero action with a movement of 3. You may only use this on your turn, and it takes 1 turn to use. This is limited to one use per season.
Magic Chest
Pay 1 mana at any time (except during the final production phase) to gain 4 coins. You may only perform this once per season. Place the mana spent activating the artifact on the token to help you remember that it has been used.
Metal Hound
Pay 3 mana on your turn to pick up any unclaimed search token on the game board and gain its rewards (even in story mode). You may only perform this once per season. Place the mana spent activating the artifact on the token to help you remember that it has been used.
Warp Stone
When taking a hero action, pay 1 mana to move +4 spaces. This does not give you a free hero action; it can only be used to help you move further during a standard hero action.
Resources
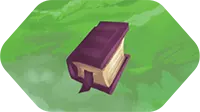
Books
Books represent lost knowledge, forgotten secrets, or rediscovered technology. Books are most commonly used to play quest cards. Books are tracked on your town board. They are also a tiebreaker at the end of the game.
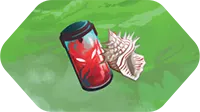
Goods
Shells, bottled demons, tools, and crystals are goods produced by villagers and buildings that can be used or traded. Goods are tracked on your town board.
Sell goods for coins. At any time, you can sell goods for coins. The season board lists combinations of goods and how many coins you gain for selling them. Be sure to reduce each good you sell on your resource track by the correct amounts. For example, if you sell a single shell, you gain 1 coin. If you sell 3 shells together, you gain 5 coins. If you sell a shell, a tool, a bottled demon, and a crystal, you gain 12 coins. Etc.
Search
If you end your move on a space with an unclaimed search token or mission token, check the letter on the space on the board and read the specified paragraph for your hero in the storybook (make sure to read the correct hero). Example: Zeik A, or Halia D. If the space does not have a letter, look up the story by the location name. Example: Zeik Crystal Meteorite.
Search tokens: If you successfully complete the story, take the search token and keep it face down near your town board. It provides 1 coin during each production phase for the rest of the game, including the final production phase. Ignore the random reward icons on the search token (you do not get these in story mode; instead, your rewards are listed in the stories).
If you end your move on a space with an unclaimed search token, you may roll a die and lose hearts equal to the result. If you reach 0 hearts, your turn ends and you do not gain the search token.
After rolling, take the search token and gain the reward listed on the opposite side. After this, keep the token face down near your town board. It provides 1 coin during each production phase for the rest of the game, including the final production phase. Some search tokens instruct you to discard them. Do not keep these as income.
Search Tokens
Search token back (face down)
- This is to remind you that this token produces 1 coin during every production phase.
- When you search and claim this token, you roll a die and lose hearts. Ignore this. You do not lose hearts from search tokens in story mode.
Select a search token below for details…
-
Lost Knowledge: Gain 1 book.
-
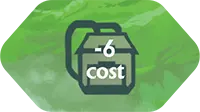
Ruined Shelter: Immediately buy 1 gear token from the season board at –6 the standard coin cost.
-
Abandoned Camp: Gain 4 coins and draw 1 quest card.
-
Abandoned Camp: Gain 5 coins.

-
Hidden Cave: Gain 1 crystal and 1 experience.
-
High-tech Ruins: Gain 1 bottled demon and 1 shell.

-
Old Teacher: Gain 2 experience.

-
High-tech Ruins: Gain 1 bottled demon and draw 1 quest card.
-
Crashed Vehicle: Gain 2 tools.

-
Lost Villager: Gain 1 villager. Discard the search token!
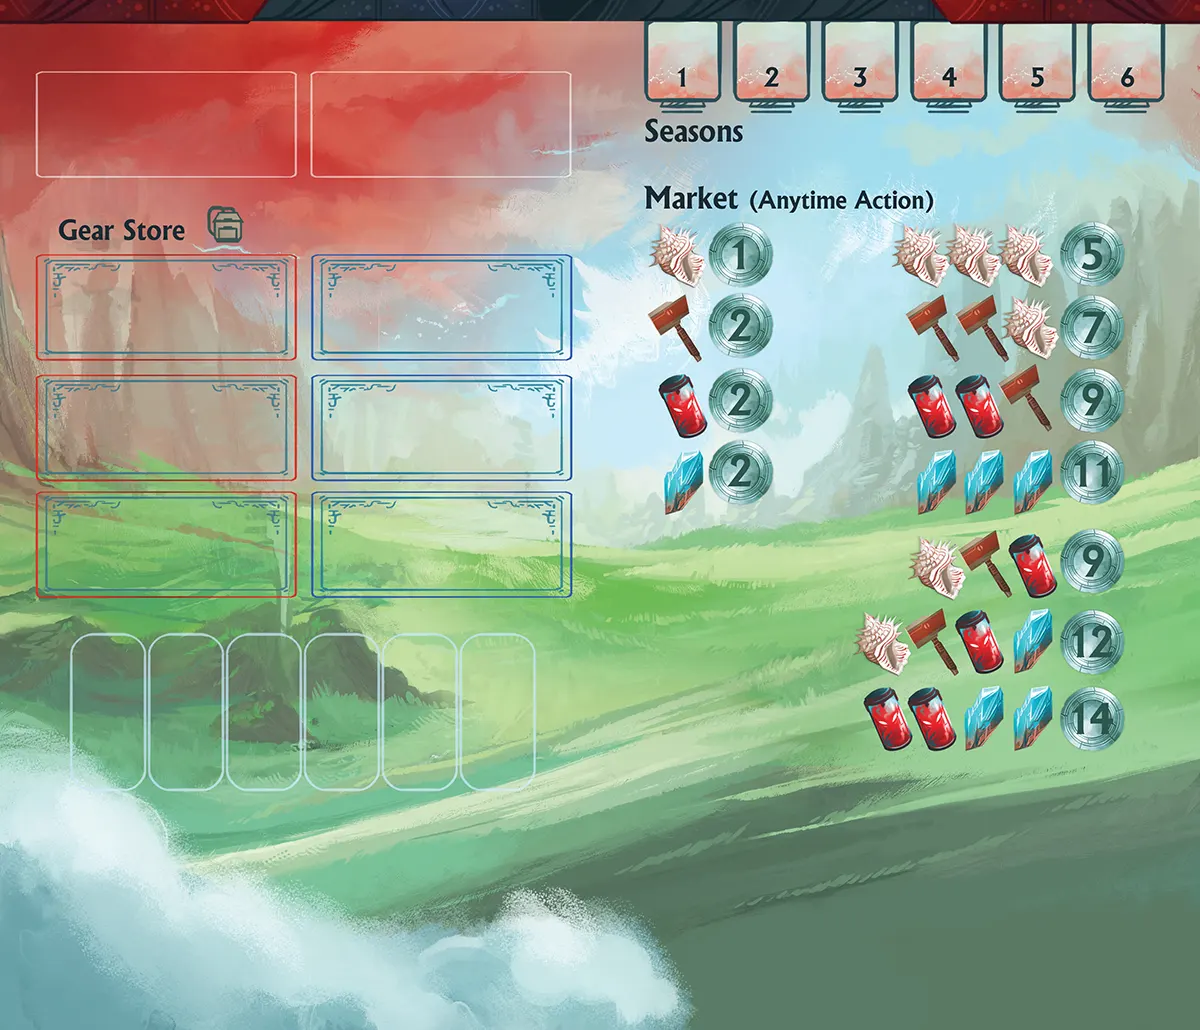
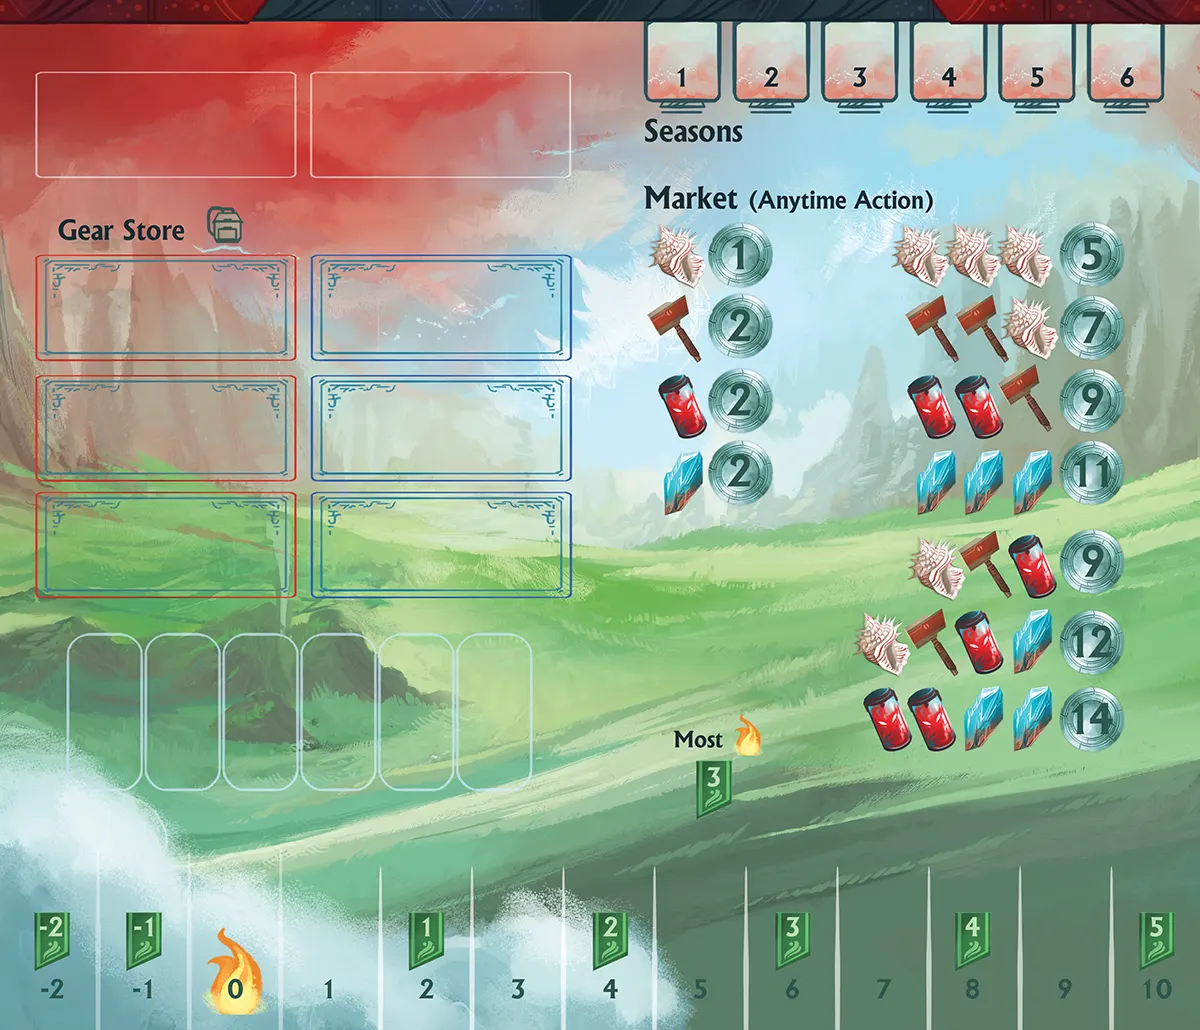
Season Board
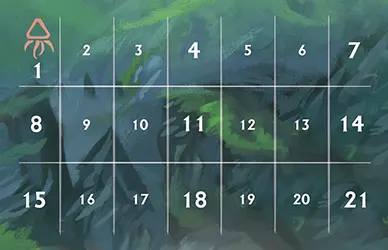
- Seasons Track: Use the season marker to mark the current round of the game.
- Gear Piles: Draw from these stacks of gear tokens to refill the gear store.
- Gear Store: Buy gear from these available tokens. Refill empty slots immediately.
- Market: Sell goods for coins using the trade values shown here.
- Villager Slots: Refill villagers when all of these slots are empty or when a player spends two experience.
-
Reputation Track: When a player gains or loses reputation as a reward from a story, the player must mark this on the reputation track (they cannot choose to ignore it). At the end of the game, players earn (or lose) victory points depending on their final reputation. A player with positive reputation earns the victory points listed on their space on the track, or the next space to the left. For example, if Zoey has 5 reputation, she earns 2 victory points. If a player has negative reputation, they lose victory points equal to their space (–1 or –2). Also, the player with the most reputation gains 3 extra victory points. If multiple players are tied for most, they each gain 3 extra victory points.
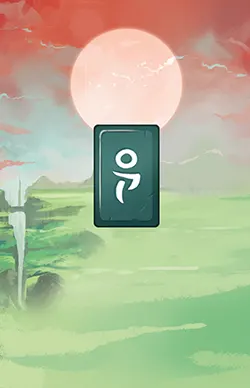
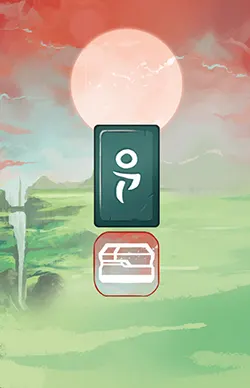
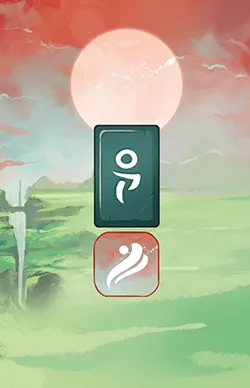
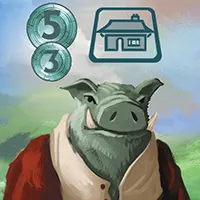
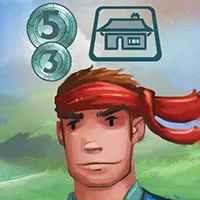
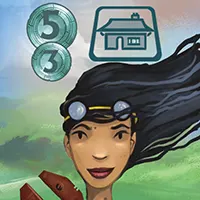
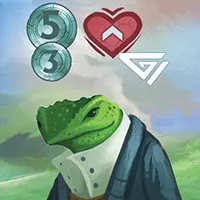
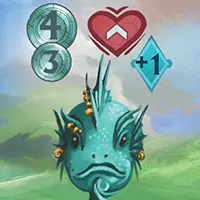
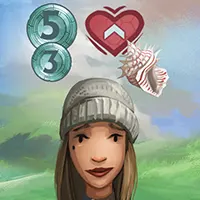
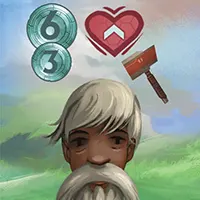
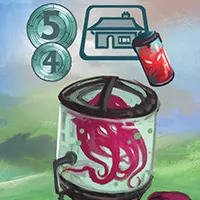
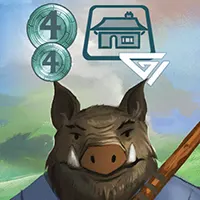
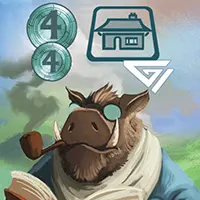
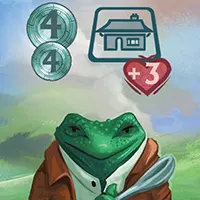
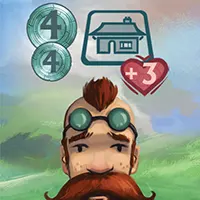
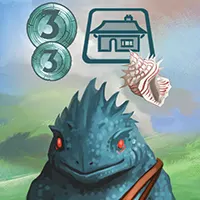
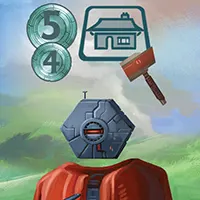
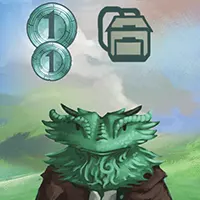
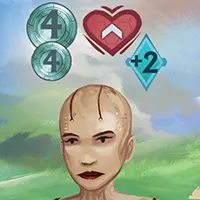
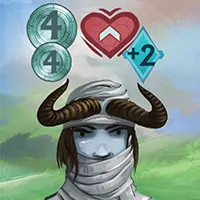
Specialist
On your turn you can use a specialist to build, gain experience, heal, buy gear, and more.
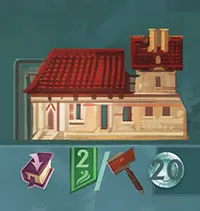
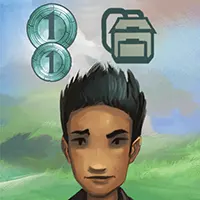
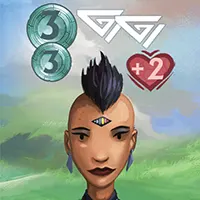
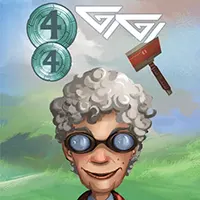
Specialist token
- Pay: Coin cost to perform the specialist’s action (double to recruit).
- Tax: Coins you collect from the supply when another player the bot uses your specialist.
- Specialist’s Action
- Rest: Instead of using the specialist’s action, you may spend a turn flipping them face down to gain 2 hearts or 1 coin.
Pay a Specialist
Pay a specialist to perform that specialist’s action. You may choose one of the following three options:
-
Pay your own specialist. You may pay any face-up specialist on your own hero board. Pay the large (upper) coin amount to the supply. Then perform the specialist’s action.
-
Pay another player's the bot's specialist. You may pay any face-up specialist on another player's the bot's hero board. You pay the large (upper) coin amount to the supply. The other player collects the small (lower) coin amount (called the "tax") from the supply. Then you perform the specialist's action. The bot does not collect tax.
-
Recruit a new specialist from the row to the side of the board. Pay DOUBLE the large (upper) coin amount to the supply. (Always pay double the upper coin amount when recruiting. Do not pay or collect the tax when recruiting.) Take the specialist and place them in one of the 4 slots at the top of your hero board. If there is no slot available, you must discard one of your specialists to make room (put the old specialist in the game box). You may replace either a used (face-down) specialist, or an unused (face-up) specialist. Then immediately perform the new specialist’s action. Draw a new specialist from the pile and place it in the row so that there are 4 available specialists at all times.
As soon as you pay any specialist (yours or another player’s) and perform their action, flip the token face down. That specialist cannot be used again until the next season.
You may pay a specialist and perform no action, or only part of the specialist’s action. You still flip the token face down in this case.
Rest One of Your Specialists
Instead of paying a specialist, you may simply flip the specialist face down and gain either 2 hearts or 1 coin (as shown on the bottom right of each specialist). You may only rest your own specialists, not those of other players.
Stories
Each character has their own set of stories for each chapter. These stories often contain the same event or encounter for each character, but have slight text, choice, or reward differences based on the hero’s abilities and personality. Some stories are completely different and tell more about the particular hero’s past and current story.
Each time you search, read the specified paragraph for your hero in the storybook.
The player to your left is the reader (unless playing solo, in which case you, of course, are the reader).
The reader then reads the story paragraph (normal text just below the story number). After this, the reader reads the choices (indicated by letters A, B, etc.). The reader only reads the title and the skill or combat level of each choice, not the reaction paragraph beneath the choice OR the rewards (in bold at the bottom of each reaction paragraph). When playing solo, you are allowed to read the rewards for each choice.
You must make a choice, roll the die, and choose how many hearts to lose. Then read the reaction paragraph to gain rewards/consequences.
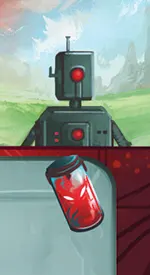
For example, when reading this example, the reader first only reads the blue text:
A robot head sticks out of the dirt, the head blinking and twirling.
-
Dig out the robot. Skill 6
As soon as the robot is free, it bashes you in the head and strides away. When you gather your senses, you discover a few useful treasures at the bottom of the hole where the robot was stuck.
REWARDS: 2 coins, 1 tool. BONUS (+2): 1 experience and 1 coin.
-
Reprogram the robot to dig itself out. Skill 8
The robot pulls at the dirt, shoving it downward like a mole. In moments it stand before you. “Ready for assignment,” it beeps.
+2 reputation. REWARDS: Gain the ROBOT Y9 token. BONUS (+2): 1 tool, 1 experience.
After the reader has finished, you select one of the choices and state your choice out loud. You then roll one die and lose hearts in an attempt to reach or exceed the skill required to succeed. Each heart you lose adds 1 to the final result. After rolling, you choose how many hearts to lose (for example, roll 3, add 5 hearts, for a total of 8).
For combat rolls, you begin combat as if you were fighting a enemy.
In either case, if you reach 0 hearts, your hero action immediately ends and you do not gain the search token or any rewards.
If the total roll plus lost hearts is equal to or greater than the required skill (or if you succeed at the combat), then you succeed. The reader then reads the reaction paragraph for the choice and you receive the listed rewards.
If your total is 2 or more above the required skill, then you also receive a bonus reward (listed after the base rewards). For example, if Jenny had a skill 8 for the choice “Dig out the robot.” in encounter 41, she would gain the standard 2 coins and 1 tool and ALSO 1 experience and 1 extra coin.
After completing the story, you remove the search token and place it next to your town board (so that it gives you 1 income at the end of each season, as in standard mode).
If you do not gain enough skill to succeed, you fail the search and your turn ends. You do not get any rewards or the search token. The token remains on the board.
Note: Some story choices require a payment of some kind in addition to a skill roll or combat. For example, if a story says “–1 coin” then the player must pay 1 coin to select this choice.
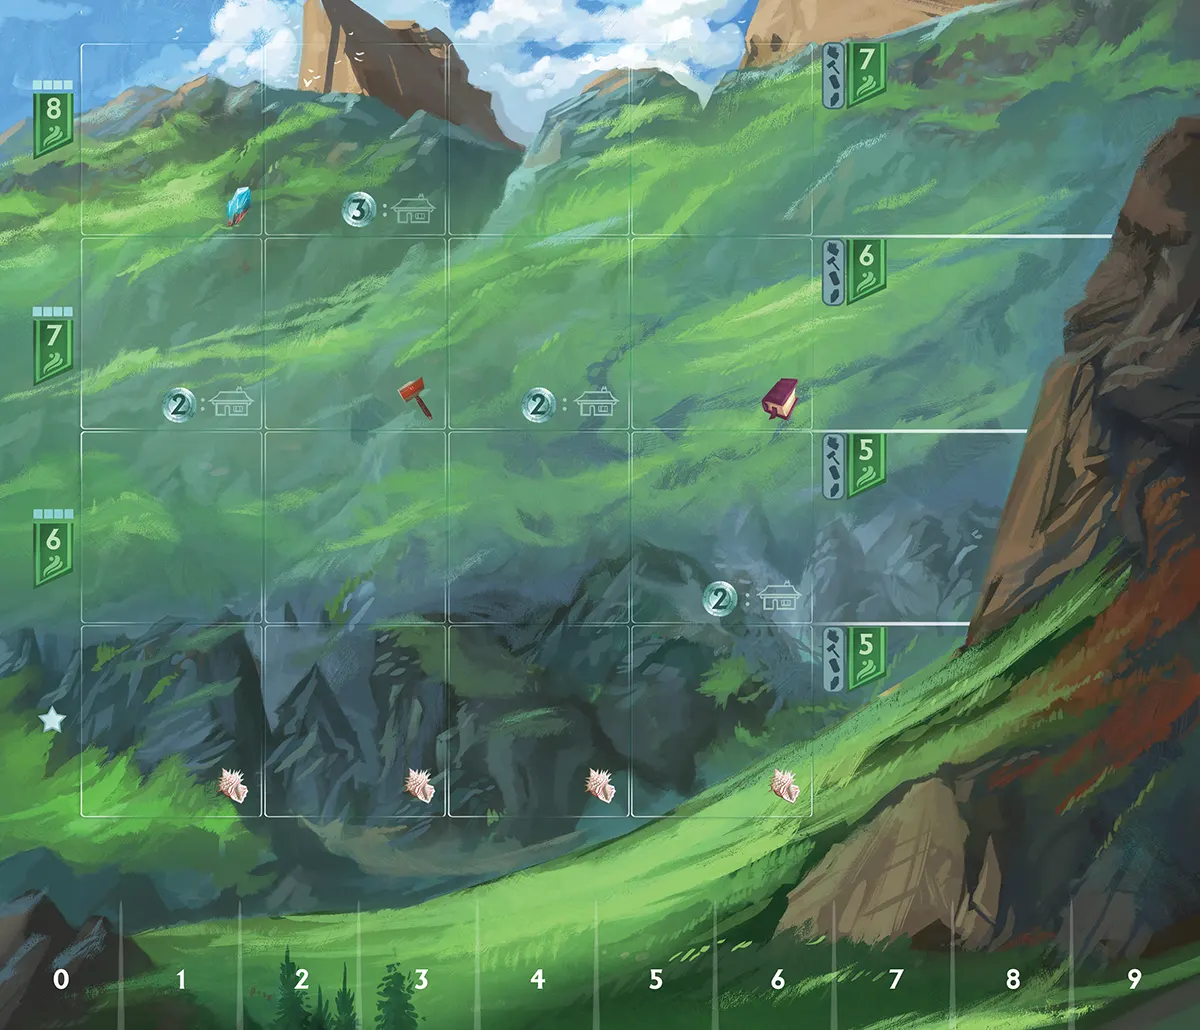
Town Board
- This column is the housing area. Each space in the area corresponds to its row for housing. When you gain villagers, you can place them in the space if you have enough housing in the same row. The victory point symbol in each box is rewarded at the end of the game if you have at least 1 of each type of villager in the row. Villagers are NOT placed on building tiles.
- Each town has 4 rows, each with 4 building spaces. Gain these victory points if you have 4 buildings in this row at the end of the game.
- Some building spaces cost extra coins to build in.
- When you build in a space with a resource icon, gain 1 of that resource.
- This star indicates that this is the starting building row.
- At the bottom of your town board is the resource track. Use the 5 resource markers to keep track of how many of each resource you own. These include shells, tools, bottled demons, crystals, and books. Whenever you gain, produce, lose, or sell a resource, move the marker up or down to keep track of your current quantity. If you ever have more than 9 of a good, place a coin token on top of the marker and start again on 0 on the track (the coin represents +10 of that good). Each of these resources except books are also known as “goods” and can be sold at any time for coins.
Villagers
Villager icon
You will find lost villagers, rescue them from enemies, or otherwise gather them to your town. Once housed, they will produce goods each season. At game end, you gain victory points for each housing row that contains villagers that produce at least 1 of each type of good.
Villager token
Place a villager: At any time, you can place one of your villagers in the housing area on the right side of your town board. You must choose one of the four rows, and you must have enough buildings in that row to hold the villager. Each building allows you to place one villager in the housing space on the same row, and each bed icon on a building allows you to place one additional villager there. Once you place a villager in housing, you cannot move that villager to a different row or trade it out with an unhoused villager. Once a villager gets settled in, they don’t want to move to a new house or sleep outside again! When you gain a villager token, if you have room, you may place the villager in housing immediately. If you do not have room, or do not want to place the villager in housing yet, you may place the villager below your town board, placing the villager in housing at any later time as long as you have enough housing to support them.

Refill villagers: Empty villager slots on the season board are refilled in two ways…
If there are no villagers left, draw 6 new villagers from the supply and refill the empty slots on the season board.
At any time, you can pay 2 experience to refill all the empty slots. You can do this even in the middle of gaining 2 or more villagers.
Visit a Location
Locations are indicated by a name on a scroll with an action beneath the scroll. When you visit a location, you may perform the action. Generally, you must pay something and/or lose hearts to gain something else.
-
If you cannot pay the specified cost, you cannot gain any of the rewards.
-
Each location action can only be performed once per turn.